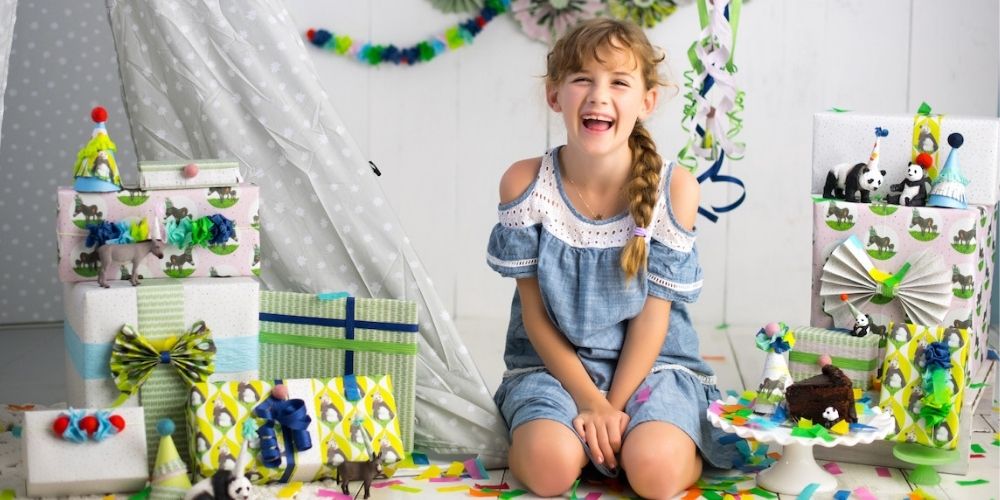
Display-worthy Handmade Holiday Decor & Paper Tree Ornaments

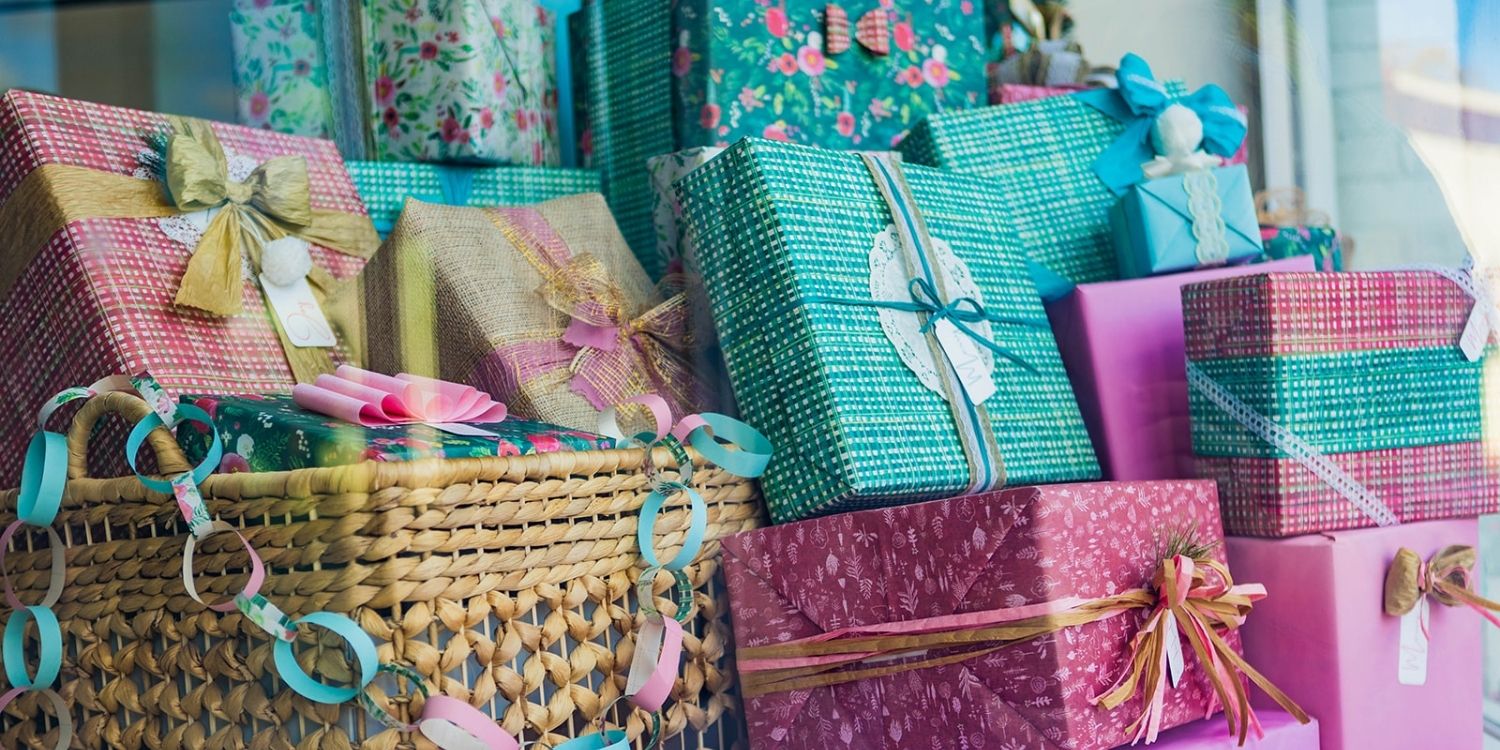
Come behind-the-scenes with professional gift wrapper Vanessa West of Avenue Wrapping as she uses Wrappily's double-sided eco wrapping paper to build a festive 'under-the-tree' holiday store window display in her hometown of Memphis, Tennessee.
Do try this at home... in this guest blog post, Vanessa shares her thoughts on creating this charming handmade Christmas decor and coordinated wrapped gifts and tree—and as a bonus: three easy-to-follow paper ornament DIYs so you can deck the halls at home.

In planning and building out the seasonal window display for the Memphis retail storefront, Vanessa chose double-sided Wrappily because "the colors and artistic patterns easily work double duty, both as wrapping paper and as decorative ornaments," she shared.
Vanessa's signature style is reusing vintage materials, "I'm a sucker for vintage paper and ribbon; I love breathing life back into forgotten things.”
The focal point of her display is an iconic, homey scene of gifts wrapped under the Christmas tree. Knowing she could craft ornaments and accents rather than having to buy a bunch of new materials, Vanessa ties the scene together with a professional touch.

Pro Tip: Vanessa creates a custom feel to her window displays by choosing a mix of coordinating papers and patterns, then layering in fabrics and vintage ribbon for texture.

Start by selecting a few patterns as the base of your holiday decor theme.

Vanessa started with the Winter Florals wrapping papers, and from there layered in a few accent colors. For a softer, not-too-traditional look she honed in on the pattern's hints of pink and blue, balanced with the neutral of burlap for texture and depth.

Don’t be afraid to use multiple patterns, but make sure to mix it up using larger and smaller scale. Throw in solids and even fabric to break up the patterns, and to add layers of texture. Using too many patterns or contrasting colors can look busy, so assess what you have along the way.
 "I'm hardwired to throw in as much random color as possible, so it takes conscious effort on my part to reign a design in," says Vanessa.
For the tree decorations, Vanessa used her chosen Wrappily papers to craft ornaments and a tree topper. Carrying the patterns and layers of textures over from her wrapped gifts brought coordinating accents from the top to bottom of her display.
 "The reversible complementing patterns on Wrappily papers made it extremely easy to pair the paper colors together for all my gifts and ornaments,” she shares.
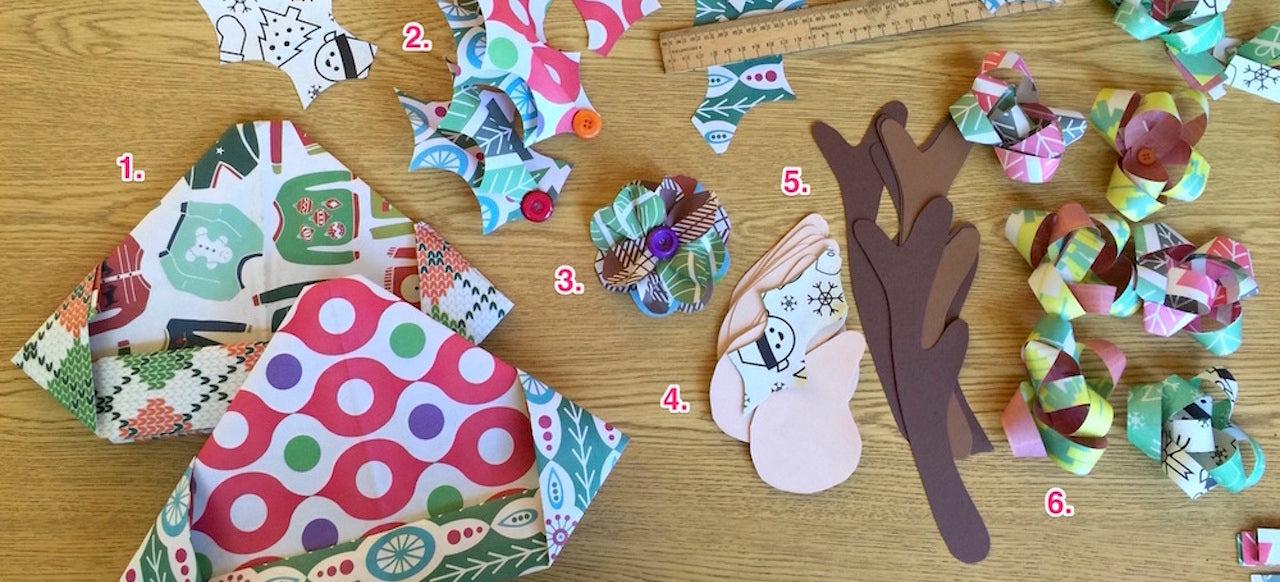
DIY Holiday Paper Tree Ornaments
Create the look on your tree (or window) at home! Grab your favorite Wrappily pattern and a few supplies to get crafting at any skill level.
Easy: Paper Chains
 Paper chains don't require perfection, which makes them a great activity to do with young children. Vanessa says, "Just cut pieces to roughly the same length and start gluing. Don't worry if the strands are wider than others or if the cuts are crooked." As a Christmas countdown cut one link in the chain off every day until Christmas!
Tools Needed:
- Wrappily Paper
- Scissors
- Adhesive (glue, tape, etc.) - I used a glue stick
Instructions:
1. Cut strips of paper to the desired size. These are roughly 7” long and 1/2” wide.

2. Glue the ends of one strip together.

3. Thread another strip through your first chain link and glue the ends of that one.

4. Repeat until you’ve reached your desired length.

Pro-Tip: Paper Chains are a versatile holiday decorating tool. Use them to fill gaps in your Christmas tree, or as window or mantel garland.

Intermediate: Paper Ornament Balls
These DIY Paper Ball Ornaments have a classic look and are perfectly suited to showcase Wrappily's reversible patterns. Another fun and easy holiday craft activity to do with kids of all ages, simply cut circles to the same size, fold, and paste together.

Supplies Needed:
- Wrappily Paper
- Scissors (or rotary cutter)
- Adhesive (glue stick, tape, etc.)
- String
- Bead (optional)
Instructions:
1. Cut circles to desired size. Eight circles were used in this example, but more can be added for a fuller look.

2. Fold each paper circle in half.

3. Keeping them folded, Apply glue to one side and attach back-to-back with your next circle. Continue until you've glued half of your circles together into half of a spheres.

4. Turn them over and apply glue to both pieces Place your string in the center (it helps if the bead is already attached to the end.

5. Attach both pieces together so the string is in the middle.

Pro-Tip: If you have thinner string, you may alternately glue all the paper pieces together to complete the full ornament, then thread the string down through the middle.

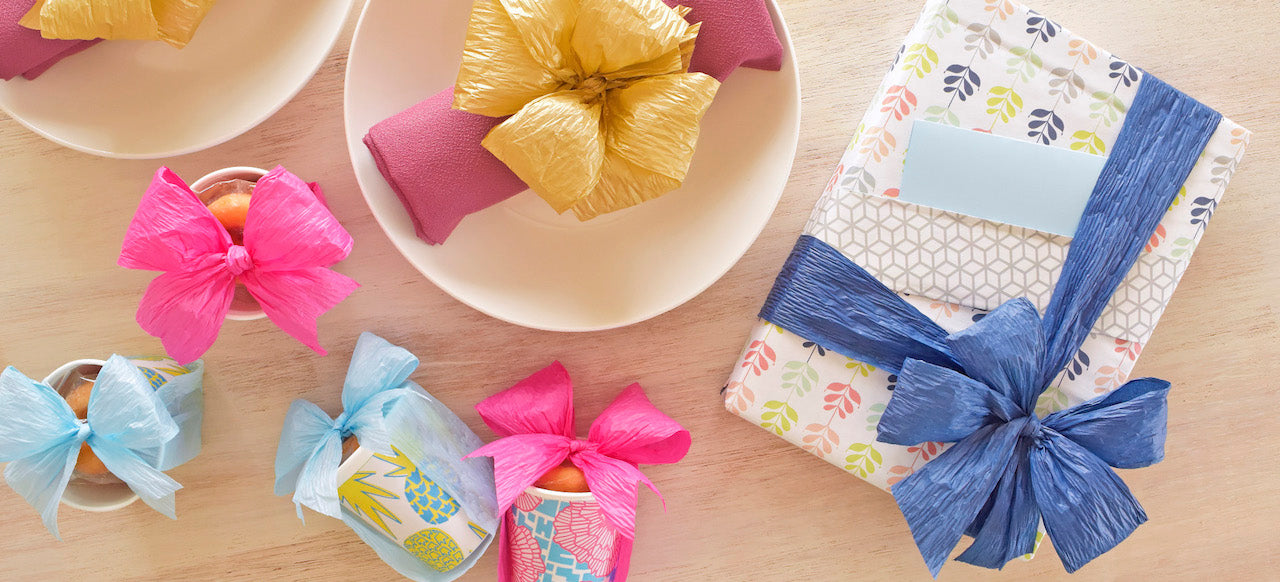
Advanced: Paper Bows
Learning how to make big, beautiful bows out of wrapping paper is a great skill to have in your pocket. They make great gift toppers, and you'll never be stuck if you run out of ribbon. The paper bows double cute holiday decor touches to add to your Christmas tree or anywhere around the house that can use a little bit of cheer. This is the most advanced craft of the three, but use these templates to follow along.

Supplies Needed:
- Wrappily Paper
- Bow Template (download one here)
- Scissors (or any other cutting tool)
- Adhesive (glue, tape, etc.)
- String
- Bread tie
Instructions:
1. Print out a bow template. Trace and cut out your bow pieces: bow tail, small inner bow, big outer bow.

2. Assemble: Fold the tail at a 45° angle in the middle. Create your bow loops by gluing the edges of the inner and outer bows to the center.

3. Layer and glue the bow elements in order from bottom to top: Big Outer Bow, Bow Tail, Small Inner Bow. Use the small strip in the template or a decorative button to finish the center with style. If you are planning to hang the bow on your tree, attach your string.

Hope these crafty wrapping and decorating DIY ideas help fill your home with warm holiday cheer.
Happy Crafting!
- - -
About the Artist - Avenue Wrapping

Vanessa West is a gift wrapper located in Memphis, TN. What started as a way to get to know her new neighbors turned into a small business. She loves being able to use her creativity in a way that makes people feel cared about. Trained as a clinical counselor, she infuses her ability to relate with people into her gift designs, making them personalized to each customer. Vanessa has a flair for mixing new and modern patterns with vintage ribbon and baubles. She's teaching her toddler the importance of giving and often when she can't decide between two colors she'll let him pick one for her.
Featured Products


Artist Series Wrap Bundle: Noel Forest by Esther Fallon-Lau
$40.99
– Sold OutCelebrate sustainably with our recycled and recyclable gift wrap featuring our full pattern collection Aussie designer Esther Fallon-Lau. Reversible patterns make gift wrapping fun! Paper works great for crafting, too.
Bundle includes one package of each:
- Homespun Plaid Red/ Winter Floral
- Noel Forest/ Wintery Wood
- Winter Floral Cream/ Homespun Plaid Green
- Cozy Cabins/ Jewels
Each package includes 3 sheets + adhesive gift tags. Sheet size 21.5" x 34"
• Premium newsprint + soy-based inks
• Plastic-free PLA packaging (plus no unnecessary cardboard tube!)
• Flat, folded sheets for easy storage
• 100% recyclable and compostable
• Milled, printed and packaged in Washington State
JOIN the mission to green-up gifting! #wrapriprecycle #wraphappy #gifthappily


Homespun Plaid Red/ Winter Floral Evergreen
$10.80
Greens, reds, plaids, holly and evergreens—all that holiday charm makes this duo an absolute delight for seasonal gift wrapping. Use alone or pair together with others from the Noel Forest collection, Esther Fallon Lau’s festive and fantastical wintry pattern wonderland.
Package includes three double-sided wrapping paper sheets + adhesive gift tags
• Sheet size 21.5" x 34"
• Premium newsprint + soy-based inks = eco-friendly wrapping paper
• Plastic-free PLA packaging
• Flat, folded sheet for easy storage
• No unnecessary cardboard tube
• 100% recyclable and compostable
• Milled, printed and packaged in Washington State
PLEASE NOTE: We don’t want a little smudge to come between us. Wrappily is uncoated newsprint, ink from darkly saturated patterns such as this will likely transfer onto fingertips during the wrapping process. Our soy-based inks are safe, non-toxic, and rinse right off with water. If this sounds like more than you bargained for, we suggest you select from our lighter patterned papers.


Winter Floral Cream/ Homespun Plaid Green
$10.80
Rustic green plaid pairs lovely with this elegant swirl of holly, evergreens, hearty winter flowers, and a snip-of-an-ode to artist Esther Fallon Lau’s Australian homeland (can you spot it?) Use alone or pair with other festive and fantastical wintry scenes from the Noel Forest holiday collection.
Package includes three double-sided wrapping paper sheets + adhesive gift tags
• Sheet size 21.5" x 34"
• Premium newsprint + soy-based inks = eco-friendly wrapping paper
• Plastic-free PLA packaging
• Flat, folded sheet for easy storage
• No unnecessary cardboard tube
• 100% recyclable and compostable
• Milled, printed and packaged in Washington State


Cozy Cabins/ Jewels - Double-sided Eco Wrapping Paper for Holiday Gifting
$10.80
This wooded cabin scene is a wee bit festive, a wee bit minimalist, and a whole lot charming. Rustic and earthy with its geometric counterpart, Serendipity Jewels, this pairing completes the festive and fantastical winter scenes in Esther Fallon Lau’s Noel Forest holiday collection.
Package includes three double-sided wrapping paper sheets + adhesive gift tags
• Sheet size 21.5" x 34"
• Premium newsprint + soy-based inks = eco-friendly wrapping paper
• Plastic-free PLA packaging
• Flat, folded sheet for easy storage
• No unnecessary cardboard tube
• 100% recyclable and compostable
• Milled, printed and packaged in Washington State


Noel Forest/ Wintery Wood
$10.80
What merry moose roam this Noel Forest! And on the back, a pale and dreamy Wintry Wood, these fantastical wintry scenes are from the imagination of Australian artist Esther Fallon Lau. They coordinate perfectly with rustic plaids and swirling florals in her Noel Forest holiday collection for Wrappily.
Package includes three double-sided wrapping paper sheets + adhesive gift tags
• Sheet size 21.5" x 34"
• Premium newsprint + soy-based inks = eco-friendly wrapping paper
• Plastic-free PLA packaging
• Flat, folded sheet for easy storage
• No unnecessary cardboard tube
• 100% recyclable and compostable
• Milled, printed and packaged in Washington State
PLEASE NOTE: We don’t want a little smudge to come between us. Wrappily is uncoated newsprint, ink from darkly saturated patterns such as this will likely transfer onto fingertips during the wrapping process. Our soy-based inks are safe, non-toxic, and rinse right off with water. If this sounds like more than you bargained for, we suggest you select from our lighter patterned papers.


Vintage Sparkle Hemp Twine Quad
$6.99
– Sold OutSparkle that fits everywhere from minimalist to shabby chic, this premium-grade polished 100% hemp twine adds a rustic bling that packs a punch for your gift wrapping. This fine crafted twine is biodegradable, eco-friendly, vegan, AZO dye-free, and oil-free.
Cord diameter is 1mm diameter, 4x30 ft. spools.