Pressed Flower Paper Eggs
March 22, 2023

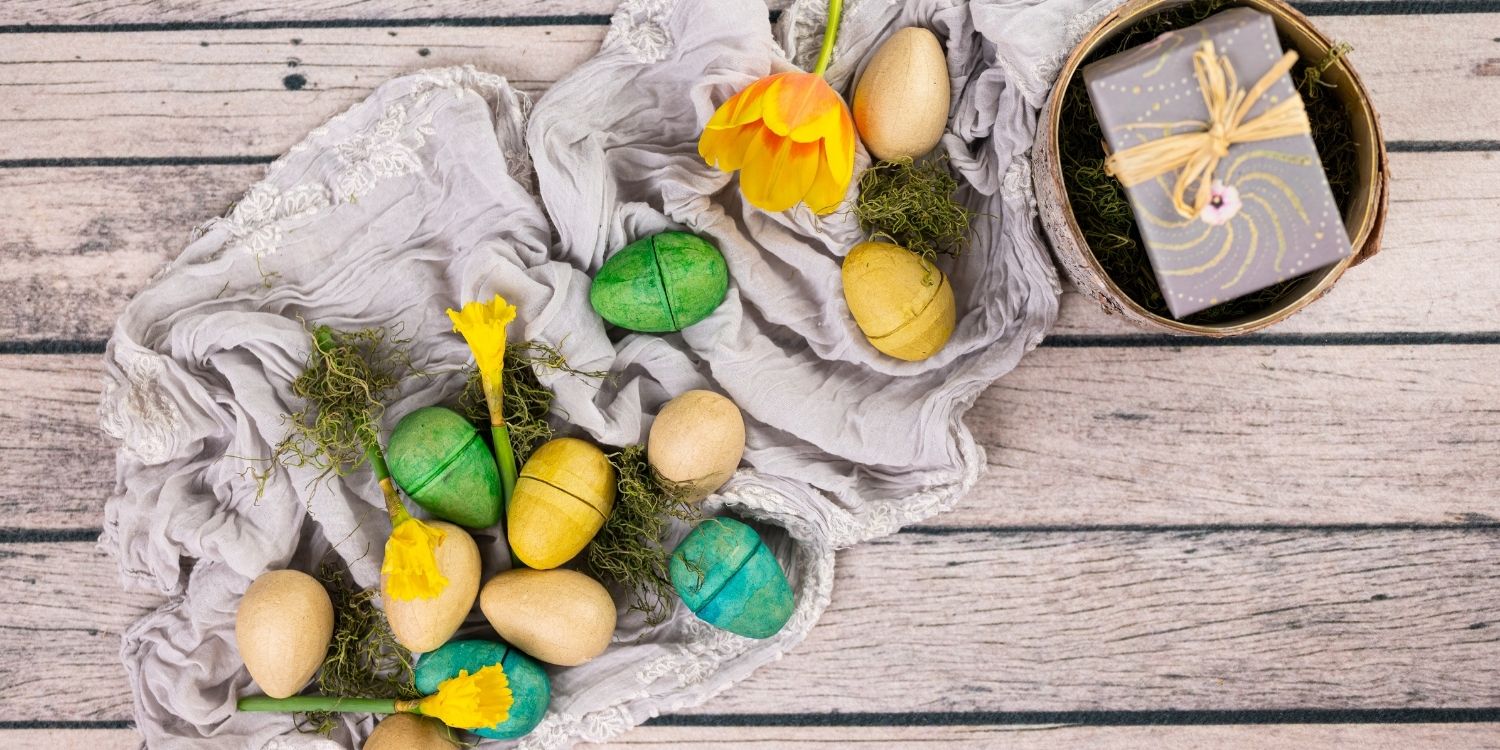
Let's decorate eggs with fresh pressed flowers! Create keepsake eggs for Easter and spring decor. Below you'll learn how to make pressed flowers and use them to decorate paper eggs. This garden inspired DIY is easy and a fun spring craft for children, teens, and adults. Step by step instructions and supply list provided.

Nature is our muse around here, if you can relate, join us on a springtime crafting journey as we collect and press wildflowers then use them to decorate paper eggs. The result is beautiful garden-inspired keepsake eggs that add a colorful touch to table displays, spring decor, and can even be used for an Easter Egg Hunt.
This multistep spring craft is fun and simple enough to do with kids, but also sophisticated enough to hold the interest of teens and adults. We've provided step by step instructions below, but please use them only as a springboard for your own creativity.

Supply List:
Flowers and leaves
Brush
Decoupage medium
Paper Eggs
Books
Blotting paper (or paper towels)
__ __ __
1. Collect your flora
Take a stroll and look for a variety of interesting shapes, silhouettes, sizes, and colors. Be adventurous and try different things—thicker flowers many be difficult to press, but you can deconstruct interesting pieces of more complex or woody blooms. Some of our favorites turned out to be lacy fern fronds, delicate and petite wild flowers, nasturtiums, and lavender.
(If you don’t have access to wildflowers or a garden to gather from, this craft project works just as well with store bought bouquets, too!)
2. Clean and ready them for pressing
Pluck off the stems, pinch off the leaves and fronds, peel open the petals, you’ll need pieces small enough to lay on the surface of your eggs.
3. Press the flowers
Ready a stack of books and trim paper towels or blotting papers to fit within their pages. Lay your flora in a single layer with space in between, making a sandwich of 2-3 papers on the top and bottom. Tuck each little flower sandwich in the pages of a book and repeat the process until all your flora is neatly tucked away for a little rest.
Stack the books and weight them so pressure is applied evenly across their surface. Leave to press for 3-5 days.
*Alternate method: for a faster turn, you can iron the flowers individually between parchment paper. This method requires a little more elbow grease, but if you don’t mind ironing, you’ll have pressed flowers without waiting days.
4. Apply pressed flowers to eggs
The flowers are ready when they’re pressed flat and their moisture has been absorbed by the paper towels. Ready your eggs, brushes, and decoupage medium of choice. We tried both Mod Podge and Nori brands here, but a 3:1 dilution of simple white craft glue to water also works.
Apply a thin layer of decoupage medium to the eggs, apply your floral bits, then cover with another layer of decoupage medium. Don’t be afraid to cover over the seam around the middle of the egg, we’ll free that up later. Lay carefully on a clean flat surface to dry, about 5-10 minutes.
Lesson learned: It's certainly a personal choice, but the Mod Podge we used had a glossy finish, and on final reflection, the matte finish would have been a better choice aesthetically in keeping with the natural, organic theme.
5. Clean up seams and edges
If needed, use an exacto or box cutter to lightly slice around the the mid-line seam to free up the two halves of the egg. Use light touch! If any stems or floral bits didn’t glue down properly you can use the exacto to clean these up, as well.
6. Display and enjoy!
Pro tip: use the drawstring sinemay bag the paper eggs are packaged in for easy storage.

Happy Crafting!

Interested in more Egg Crafts? Try These from the Gift Happily Blog:
Join Our Newsletter
Exclusive access to sales, craft ideas, and gift inspirations
Featured Products


Eco Shred Basket Filler - Jungle
$7.00
– Sold OutA perfect nest for your goodies, this pliable recycled printed paper shred is easy to work with and provides a lofty fill to be used as Easter grass, basket/box filler, or crinkle-paper alternative.
Why You’ll Love this Eco-Friendly Basket Filler:
- Colorful prints add a subtle pop of color to your gift baskets, party centerpieces, and care packages being shipped around the country.
- The perfect party decor that can be stored with Easter decorations and reused year after year.
- Have fun designing a perfect basket with this fluffy stuff! Keep the fun colors and whimsy you’d expect from Easter grass and crinkle-paper filler without the plastic.
- Feel good knowing your eco-shred is recyclable and compostable. Your choice makes a big impact to green-up gifting.
Sustainable Materials:
- Package includes approximately 4 ounces of recyclable & compostable paper shred.
- Made in the USA with recycled, premium-grade newsprint that is sustainably milled, printed, and packaged in Washington State.
- Printed with soy-based inks
- Clear packaging is PLASTIC-FREE, made of biodegradable plant-based PLA


Paper Maché Eggs, Set of 6
$12.99
– Sold OutFinally, an eco-friendly alternative to dreaded plastic Easter eggs! Set of six sturdy paper maché eggs that are designed to be decorated to your heart's desire (but are certainly lovely enough to be used in the buff, too!) Hide them, display them, save them as a keepsake year after year. These handmade eggs are crafted from up-cycled newspaper and natural rice paste, they're 100% plastic-free, biodegradable and compostable. Perfect vegan alternative for Easter eggs! Each egg measures 6x4 cm; set of six eggs comes in a reusable drawstring natural fiber bag. Note: these eggs do not open and are not fillable.


Eco Shred Basket Filler - Rainbow Flash
$6.49 $7.00
A perfect nest for your goodies, this pliable recycled printed paper shred is easy to work with and provides a lofty fill to be used as Easter grass, basket/box filler, or crinkle-paper alternative.
Why You’ll Love this Eco-Friendly Basket Filler:
- Colorful prints add a subtle pop of color to your gift baskets, party centerpieces, and care packages being shipped around the country.
- The perfect party decor that can be stored with Easter decorations and reused year after year. Have fun designing a perfect basket with this fluffy stuff! Keep the fun colors and whimsy you’d expect from Easter grass and crinkle-paper filler without the plastic.
- Feel good knowing your eco-shred is recyclable and compostable. Your choice makes a big impact to green-up gifting.
Sustainable Materials: Package includes approximately 4 ounces of recyclable & compostable paper shred. Made in the USA with recycled, premium-grade newsprint that is sustainably milled, printed, and packaged in Washington State. Printed with soy-based inks. Clear packaging is PLASTIC-FREE, made of biodegradable plant-based PLA


Eco Shred Basket Filler - Yellow
$7.00
A perfect nest for your goodies, this pliable recycled printed paper shred is easy to work with and provides a lofty fill to be used as Easter grass, basket/box filler, or crinkle-paper alternative.
Why You’ll Love this Eco-Friendly Basket Filler:
- Colorful prints add a subtle pop of color to your gift baskets, party centerpieces, and care packages being shipped around the country.
- The perfect party decor that can be stored with Easter decorations and reused year after year. Have fun designing a perfect basket with this fluffy stuff! Keep the fun colors and whimsy you’d expect from Easter grass and crinkle-paper filler without the plastic.
- Feel good knowing your eco-shred is recyclable and compostable. Your choice makes a big impact to green-up gifting.
Sustainable Materials: Package includes approximately 4 ounces of recyclable & compostable paper shred. Made in the USA with recycled, premium-grade newsprint that is sustainably milled, printed, and packaged in Washington State. Printed with soy-based inks. Clear packaging is PLASTIC-FREE, made of biodegradable plant-based PLA


Raffia Flower Gift Topper, set of 3
$9.99 $12.00
A set of three crochet raffia flowers designed to add a quick touch of natural elegance to any gift bag or box. Handmade of abaca leaf fiber (a relative to the banana plant) with just a hint of sparkle woven in. Ties on easily with loop on back and provided twine for a perfect look every time!


Seeds 'n Blooms/ Ladybugs
$10.80
– Sold OutWrap the best looking gift at the party! Presenting the eco-friendly, double-sided wrapping paper of your dreams: Seeds 'n Blooms is a new Wrappily exclusive by illustrator and graphic designer Misha Zadeh.
Celebrate sustainably with our recycled and recyclable wrapping paper. Reversible patterns make holiday gift wrapping fun! Paper works great for crafting, too.
Package includes three double-sided wrapping paper sheets + adhesive gift tags
• Sheet size 21.5" x 34"
• Premium newsprint + soy-based inks = eco-friendly wrapping paper
• Plastic-free PLA packaging
• Flat, folded sheet for easy storage
• No unnecessary cardboard tube
• 100% recyclable and compostable
• Milled, printed and packaged in Washington State
JOIN the mission to green-up gifting!
#wrapriprecycle #wraphappy #gifthappily


Sea Green (Paper Ribbon)
$7.50
-
Wrap it up and tie it with a bow! This eco-friendly paper ribbon not only adds a perfect pop of color, it's recyclable, compostable and made with non-toxic, water soluble dyes. What a score! It's shapable, versatile, fairly sturdy, and has a great crinkle texture allowing you to get creative tying-on that finishing touch to your gifts.
-
Ribbon is 1.5" wide. Each spool is 25 yards.


Enchanted Garden - Double-sided Eco Wrapping Paper for Everyday Gifting
$10.80
– Sold Out-
What kind of magical realm do those lovely keys unlock? One filled of sweet bunnies, fanciful feathered friends, and bursts of blooming flowers. The Enchanted Garden, designed by Tamara Houtveen, offers two charming patterns, perfect gift wrap for baby showers, kids' birthdays, or anyone who fancies a bit of whimsy and romance.
This pattern was a crowd-favorite winner in our annual EarthDay Design Contest. -
Wrappily's reversible gift wrap sheets come flat and folded with complementary gift tag stickers. Full sheet size is 21.5" x 34". Printed in Washington State on recycled and recyclable newsprint.


Orchid - Cotton Curling Ribbon
$7.00
– Sold OutLoop it, tie it, curl it –– this Orchid cotton curling ribbon is the perfect eco-friendly alternative to plastic curling ribbons.
Why You’ll Love this Curling Ribbon:
- Curls easily with scissors. Crimped or uncrimped - this ribbon curls like magic.
- Get creative with your ribbon styles - split into thinner strands or even quill into fun shapes to use as a gift topper. The sky is the limit! Check out our blog for more creative ideas.
- Feel good choosing a ribbon that’s plastic-free, compostable, and biodegradable. It really makes an impact to green-up gifting!
Sustainable Materials:
- Uncoated and unwoven cotton curling ribbon is 1/2” wide. Each spool is 10 yards.
- Beautiful COLOR made with water-based dyes and soy-based non-toxic ink.
- Made in the USA with cotton yarn sustainably grown & dyed by an artisanal ribbon maker in Milwaukee, Wisconsin
- Plastic-free packaging on a cardboard spool.
Care & Disposal Instructions:
- Store in cool, dry area outside of direct sunlight to preserve color.
- Uncoated ribbon is stiffer than its plastic counterparts and may require a heavier hand to hold & tie. We recommend creasing the corners where the ribbon wraps around your box for a nice crisp look.
- Compost in your green bin or in the backyard with your compostable gift wrap.


Mushrooms/ Snails
$10.80
Wrap the best looking gift at the party! Presenting the eco-friendly, double-sided wrapping paper of your dreams: Mushrooms/Snails is a new Wrappily exclusive by illustrator and graphic designer Misha Zadeh.
Celebrate sustainably with our recycled and recyclable wrapping paper. Reversible patterns make holiday gift wrapping fun! Paper works great for crafting, too.
Package includes three double-sided wrapping paper sheets + adhesive gift tags
• Sheet size 21.5" x 34"
• Premium newsprint + soy-based inks = eco-friendly wrapping paper
• Plastic-free PLA packaging
• Flat, folded sheet for easy storage
• No unnecessary cardboard tube
• 100% recyclable and compostable
• Milled, printed and packaged in Washington State
JOIN the mission to green-up gifting!
#wrapriprecycle #wraphappy #gifthappily


Eco Shred Basket Filler - Spring
$7.00
– Sold OutA perfect nest for your goodies, this pliable recycled printed paper shred is easy to work with and provides a lofty fill to be used as Easter grass, basket/box filler, or crinkle-paper alternative.
Why You’ll Love this Eco-Friendly Basket Filler:
- Colorful prints add a subtle pop of color to your gift baskets, party centerpieces, and care packages being shipped around the country.
- The perfect party decor that can be stored with Easter decorations and reused year after year. Have fun designing a perfect basket with this fluffy stuff! Keep the fun colors and whimsy you’d expect from Easter grass and crinkle-paper filler without the plastic.
- Feel good knowing your eco-shred is recyclable and compostable. Your choice makes a big impact to green-up gifting.
Sustainable Materials: Package includes approximately 4 ounces of recyclable & compostable paper shred. Made in the USA with recycled, premium-grade newsprint that is sustainably milled, printed, and packaged in Washington State. Printed with soy-based inks. Clear packaging is PLASTIC-FREE, made of biodegradable plant-based PLA


Pink Hibiscus
$10.80
– Sold OutCelebrate sustainably with Wrappily recycled and recyclable double-sided eco wrapping paper featuring the nostalgic botanical visions of Lola Pilar Hawaii. Reversible patterns make gift wrapping fun! Paper works great for crafting, too.
Package includes three sheets + adhesive gift tags
• Sheet size 21.5" x 34"
• Premium newsprint + soy-based inks
• Plastic-free PLA packaging
• Flat, folded sheet for easy storage
• No unnecessary cardboard tube
• 100% recyclable and compostable
• Milled, printed and packaged in Washington State
JOIN the mission to green-up gifting! #wrapriprecycle #wraphappy #gifthappily


Jonquil - Cotton Curling Ribbon
$7.00
– Sold OutLoop it, tie it, curl it –– this Jonquil yellow cotton curling ribbon is the perfect eco-friendly alternative to plastic curling ribbons.
Why You’ll Love this Curling Ribbon:
- Curls easily with scissors. Crimped or uncrimped - this ribbon curls like magic.
- Get creative with your ribbon styles - split into thinner strands or even quill into fun shapes to use as a gift topper. The sky is the limit! Check out our blog for more creative ideas.
- Feel good choosing a ribbon that’s plastic-free, compostable, and biodegradable. It really makes an impact to green-up gifting!
Sustainable Materials:
- Uncoated and unwoven cotton curling ribbon is 1/2” wide. Each spool is 10 yards.
- Beautiful COLOR made with water-based dyes and soy-based non-toxic ink.
- Made in the USA with cotton yarn sustainably grown & dyed by an artisanal ribbon maker in Milwaukee, Wisconsin
- Plastic-free packaging on a cardboard spool.
Care & Disposal Instructions:
- Store in cool, dry area outside of direct sunlight to preserve color.
- Uncoated ribbon is stiffer than its plastic counterparts and may require a heavier hand to hold & tie. We recommend creasing the corners where the ribbon wraps around your box for a nice crisp look.
- Compost in your green bin or in the backyard with your compostable gift wrap.


Eco Shred Basket Filler - Candy Stripe
$6.49 $7.00
A perfect nest for your goodies, this pliable recycled printed paper shred is easy to work with and provides a lofty fill to be used as Easter grass, basket/box filler, or crinkle-paper alternative.
Why You’ll Love this Eco-Friendly Basket Filler:
- Colorful prints add a subtle pop of color to your gift baskets, party centerpieces, and care packages being shipped around the country.
- The perfect party decor that can be stored with Easter decorations and reused year after year. Have fun designing a perfect basket with this fluffy stuff! Keep the fun colors and whimsy you’d expect from Easter grass and crinkle-paper filler without the plastic.
- Feel good knowing your eco-shred is recyclable and compostable. Your choice makes a big impact to green-up gifting.
Sustainable Materials: Package includes approximately 4 ounces of recyclable & compostable paper shred. Made in the USA with recycled, premium-grade newsprint that is sustainably milled, printed, and packaged in Washington State. Printed with soy-based inks. Clear packaging is PLASTIC-FREE, made of biodegradable plant-based PLA


Lamb Meadow
$6.99
– Sold OutLittle lambs leaping through the meadow, what a peaceful scene! In soft hues, it makes a lovely choice for baby shower gifts or little kids birthdays. Designed by Sanna Kallio, Lamb Meadow is a crowd favorite from our annual Earth Day Design Contest.
Wrappily's reversible gift wrap sheets come flat and folded with complementary gift tag stickers. Sheet size is 21.5" x 34". Printed in Washington State on recycled and recyclable newsprint.


Jana Lam - Plumeria + Palm Shadow
$10.80
– Sold OutCelebrate sustainably with our recycled and recyclable double-sided eco wrapping paper featuring the bold tropical pattern play of Hawaii-based textile designer, Jana Lam. Reversible patterns of bold plumeria blossoms mix with shadowy palm fonds to make gift wrapping fun! Paper works great for crafting, too.
Package includes three sheets + adhesive gift tags
• Sheet size 21.5" x 34"
• Premium newsprint + soy-based inks
• Plastic-free PLA packaging, certified compostable + biodegradable
• Flat, folded sheet for easy storage
• No unnecessary cardboard tube
• 100% recyclable and compostable
• Milled, printed and packaged in Washington State
JOIN the mission to green-up gifting!
#wrapriprecycle #wraphappy #gifthappily


Pink (Paper Ribbon)
$7.50
-
Wrap it up and tie it with a bow! This eco-friendly paper ribbon not only adds a perfect pop of color, it's recyclable, compostable and made with non-toxic, water soluble dyes. What a score! It's shapable, versatile, fairly sturdy, and has a great crinkle texture allowing you to get creative tying-on that finishing touch to your gifts.
-
Ribbon is 1.5" wide. Each spool is 25 yards.


Jana Lam - Retro Blooms + Monstera Shadow
$10.80
Celebrate sustainably with our recycled and recyclable double-sided eco wrapping paper featuring the bold, tropical pattern play of Hawaii-based textile designer, Jana Lam. Reversible patterns of monstera leaves mingle with retro flower blossoms to make gift wrapping fun! Paper works great for crafting, too.
Package includes three sheets + adhesive gift tags
• Sheet size 21.5" x 34"
• Premium newsprint + soy-based inks
• Plastic-free PLA packaging, certified compostable + biodegradable
• Flat, folded sheet for easy storage
• No unnecessary cardboard tube
• 100% recyclable and compostable
• Milled, printed and packaged in Washington State
JOIN the mission to green-up gifting!
#wrapriprecycle #wraphappy #gifthappily


Pineapple Splash/ Mini Palm - Double-sided Eco Wrapping Paper for Everyday Gifting
$10.80
Somewhere over the rainbow... purple pineapples float amidst the palms. At least they do in Hawaii-based fine artist Lauren Roth's dreamy tropical visions. Pineapple Splash/ Mini Palms is part of her Over the Rainbow collection, a juicy new addition to our everyday gift wrap.
Wrappily's reversible gift wrap sheets come flat and folded with complementary gift tag stickers. Sheet size is 21.5" x 34". Printed in Washington State on recycled and recyclable newsprint.


Jana Lam - Tropical Leaves/ Rainbow Orchids
$10.80
– Sold OutTextile designer Jana Lam's newest patterns for Wrappily are the stuff tropical dreams are made of—a juicy rainbow full of shells, pineapples, and lots of flower power. Tropical Leaves/ Rainbow Orchids pairs two Jana Lam signatures: bold banana leaves and orchids in a rainbow gradient. The combo offers a perfect 'everyday' gift wrap for graduations, weddings, birthdays, and more.
Coordinates with:
Pineapple Blush/ SeaFlower
Monstera Jungle/ Shellini
Paper Ribbon Quad: Island Dream
Reversible gift wrap sheets come flat and folded with complementary gift tag stickers. Three sheets per pack. Each Sheet is 21.5" x 34”. Printed in Washington State on recycled and recyclable newsprint.


Rainbow Sails/Dots
$10.80
Celebrate sustainably with our recycled and recyclable double-sided eco wrapping paper featuring the cheerful art of watercolorist and published author, Meera Lee Patel. Reversible patterns make gift wrapping fun! Paper works great for crafting, too.
Package includes three sheets + adhesive gift tags
• Sheet size 21.5" x 34"
• Premium newsprint + soy-based inks
• Plastic-free PLA packaging
• Flat, folded sheet for easy storage
• No unnecessary cardboard tube
• 100% recyclable and compostable
• Milled, printed and packaged in Washington State
JOIN the mission to green-up gifting!
#wrapriprecycle #wraphappy #gifthappily


Pineapple Blush/ Sea Flower by Jana Lam
$10.80
Wrap the best looking gift at the party!
Presenting the eco-friendly, double-sided wrapping paper that tropical dreams are made of:
Pineapple Blush/ SeaFlower by Jana Lam packs a fruity punch, mixing and matching this combo of soft-petaled pua (flowers) and pineapple sweeties will add a rosy touch to any gift.
Each pack of gift wrap includes: (3) Sheets of double-sided wrapping paper and adhesive gift tags. Each full sheet size is 21.5" x 34”. Paper arrives flat and folded in plastic-free PLA bag made of plant starch.
Our eco-friendly wrapping paper is milled, printed, and packaged in Washington State on recycled SFI certified newsprint making it 100% Recyclable and Compostable.


Hibiscus Fan/ Rainbow Stripes
$10.80
– Sold OutIt's hard to say which is more uplifting here, the unabashedly happy painted rainbow stripes or the deliciously divine floral fan palms. We know one thing, when used together there's a multiplier effect of pure joy. Hibiscus Fan Palm/ Rainbow Stripes is part of our new everyday gift wrap collection, Over the Rainbow, designed for us by Hawaii-based fine artist Lauren Roth.
Wrappily's reversible gift wrap sheets come flat and folded with complementary gift tag stickers. Sheet size is 21.5" x 34". Printed in Washington State on recycled and recyclable newsprint.
Related Articles
© 2025 Wrappily. Powered by Shopify


