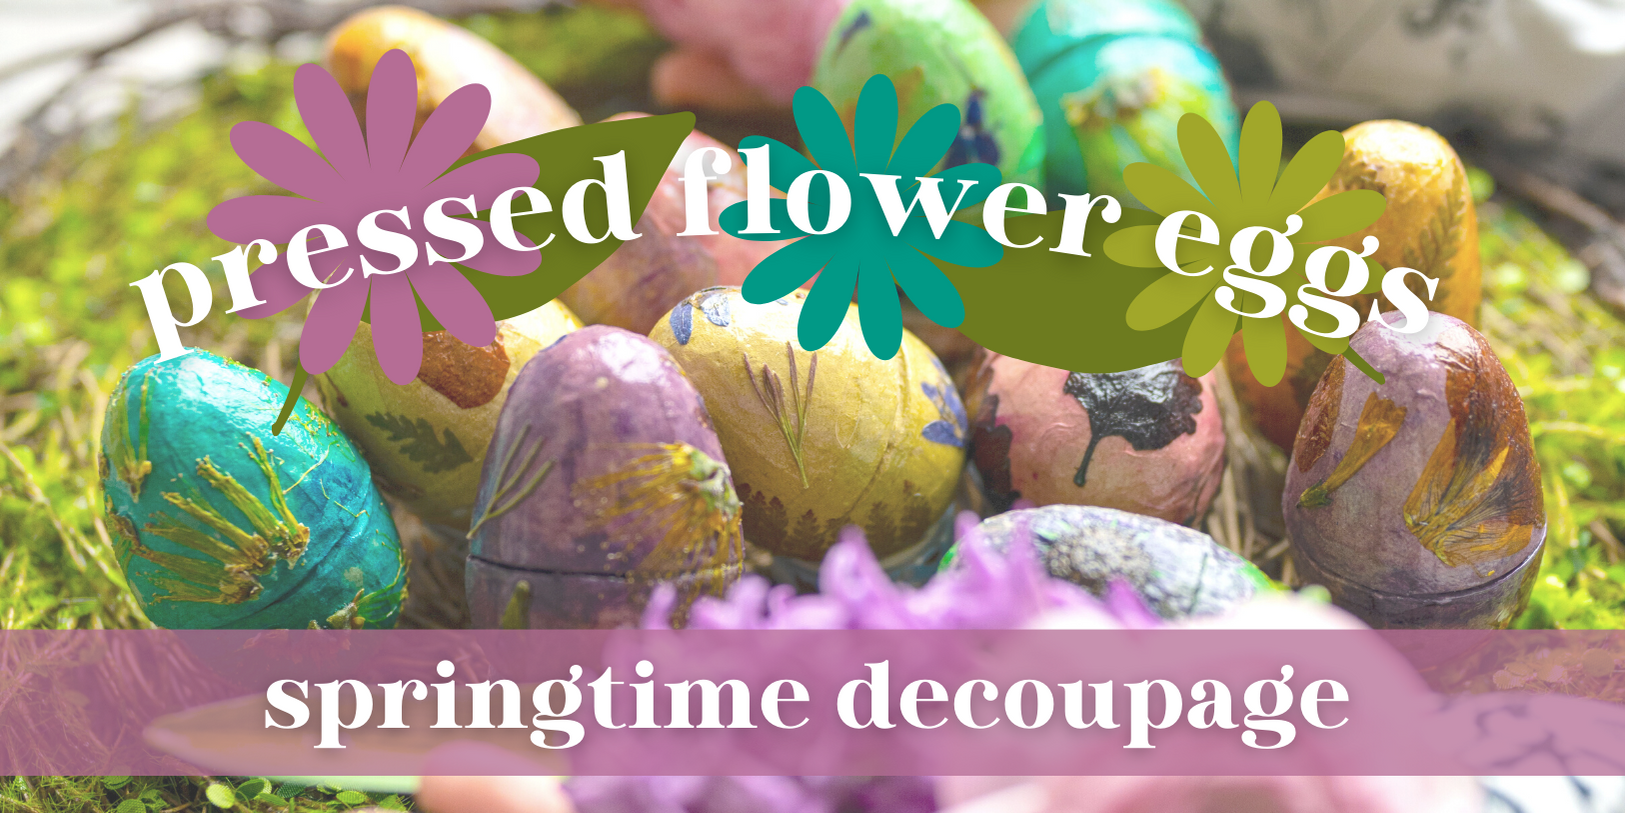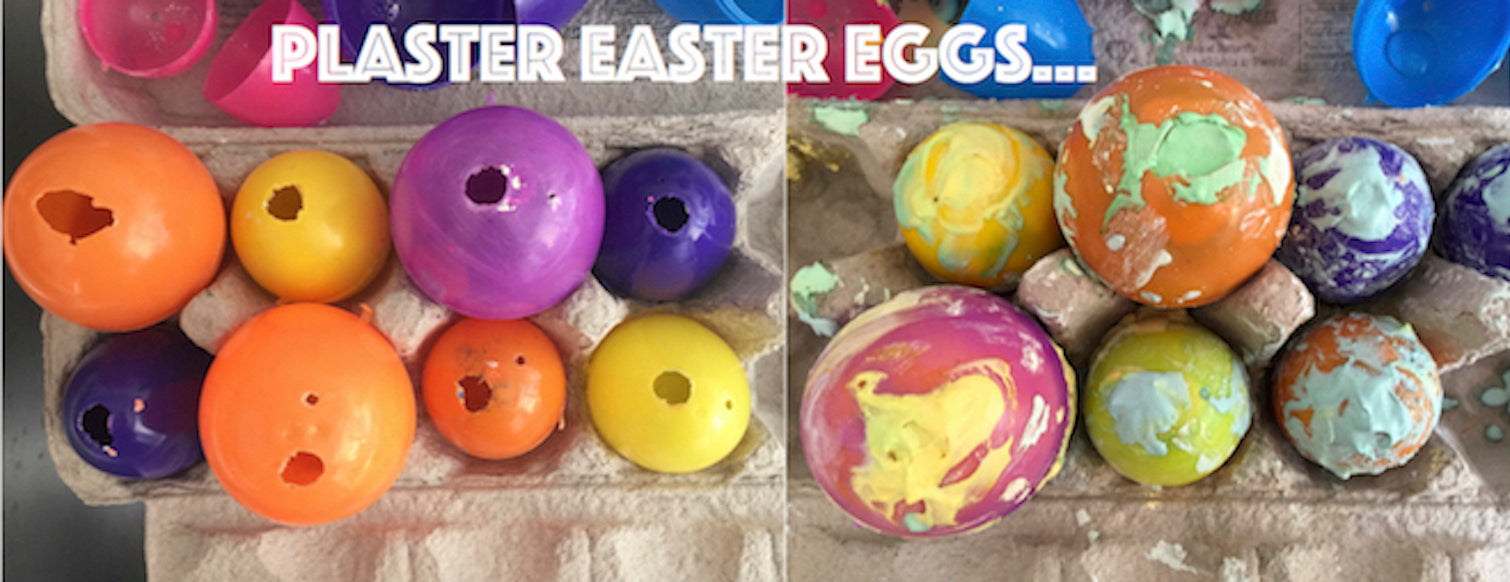
Spring Crafting with Paper Eggs

Tara Gray of @ModernMaven is back on the Wrappily blog with three crafty tutorials to make your spring decor shine using our new paper eggs. Use these quick ideas to decorate your eggs at home that can be used in table centerpieces, welcome wreaths, or window displays.
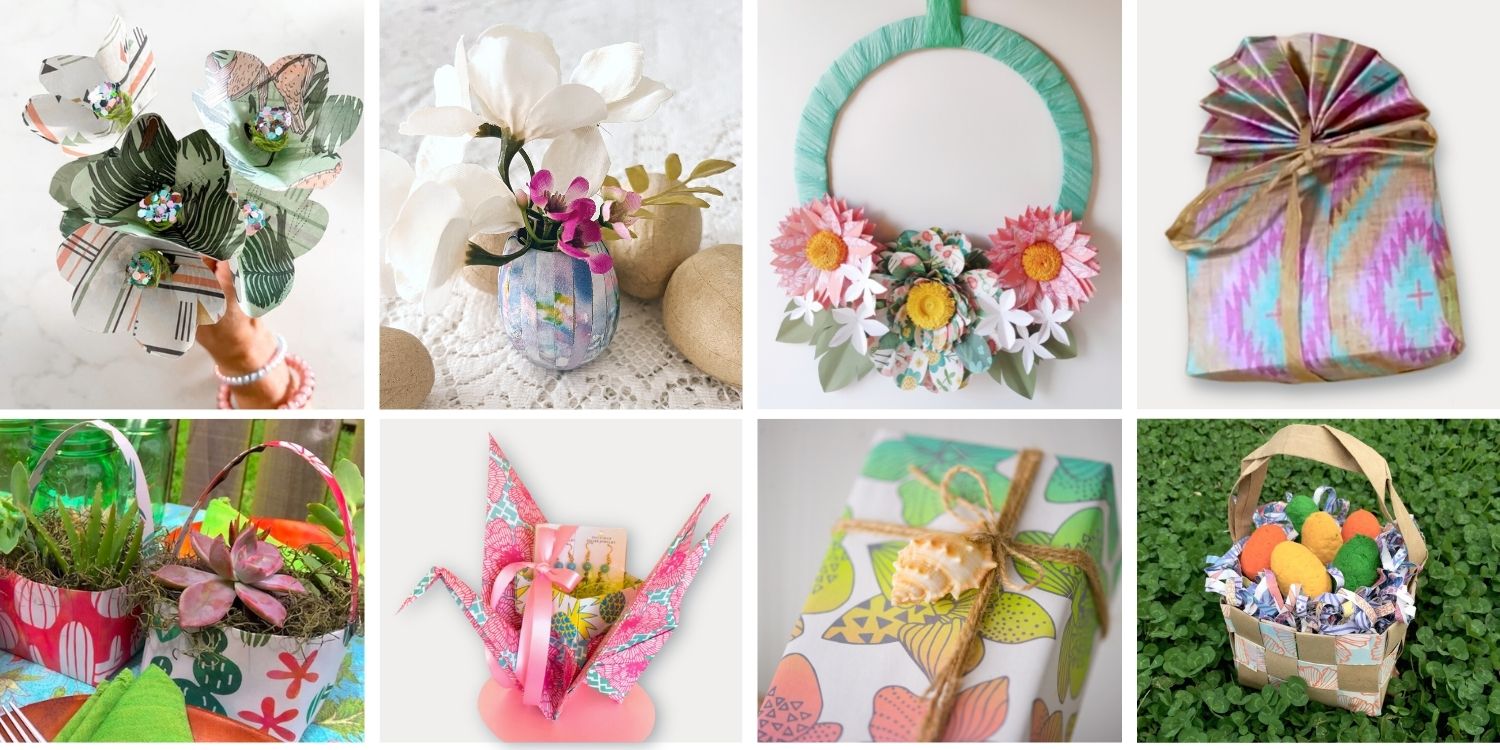
"Each of these projects can be done on its own or brought together to create a spring themed centerpiece for Easter. They also create darling gifts for friends, neighbors, and teachers” Tara shares. So go through your craft bins and gather your cutest mini accents you’ve been saving for the right project to craft along with us.
Paper Egg Diorama
A diorama is a window to a magical scene, so this project is a perfect place for creativity to soar. Poke around the house or your craft bin for mini decorative accents to use. Decor themes of nature or spring are seasonally fun, but your egg diorama is a blank slate. And while this is a kid-friendly craft, it is highly recommended that an adult handle the cutting step.

Supplies:
- Kraft Paper Eggs
- Wrappily Paper (used here: Enchanted Garden)
- Eco Shred (used here: Yellow)
- Mod Podge
- Small paint brush with pointed end
- Hot glue
- C-clamp
- Sharp cutting tool like an X-acto or serrated knife
- Decorative accents (used here: mini mushrooms & ladybugs)
Step 1: Clamp & Cut Egg Opening

To create the opening for the diorama, slice off one side of the egg. These sturdy paper eggs are tough to cut, use the clamp (not your fingers!) to securely hold the egg as you carefully make your cuts. Be extremely cautious here, and always cut away from your body.
Step 2: Decorate the Outside of the Egg

Cut small pieces of decorative paper or your favorite Wrappily pattern to decorate the egg. Paper pieces that are too large will wrinkle and not fit the shape of the egg. For this project, Tara chose elements like spring flowers and animals from our Enchanted Garden.
Using a small brush, apply a thin layer of Mod Podge on the back of each paper piece and smooth it onto the egg, layering as much as desired until the egg is covered.
Pro Tip: level up by using this same technique to decorate the inside of the egg, too.
Step 3: Add Finishing Touches Inside the Diorama

Scrunch up small bits of Eco Shred, moss, or your filler of choice and stuff into the bottom of the egg. Use dots of hot glue to keep in place.
Cover the exposed cut edge of the egg with your choice of trim applied with hot glue. Add final diorama elements to the interior of the egg. Tara used teeny mushrooms and ladybugs, but other ideas include live baby succulents or air plants, candies like jelly beans or mini chocolate bunnies, or even shells.

Mini Egg Baskets
Here’s a quick, easy, and versatile craft that turns the two halves of fillable paper eggs into mini baskets. Fill with treats and they’d work great in a table centerpiece or even as an individual place setting for a formal dinner or tea party.

Supplies:
- Fillable Paper Eggs
- Wrappily Natural Cotton Ribbon (used here: Everyday Soft Naturals Bundle)
- Wrappily Eco Shred (used here: Rainbow Flash)
- Hot glue
- Decorative accents
Step 1:
Cut ribbon into ~3" sections depending on the desired height of the handles. Separate egg halves to serve as the basket bases, add ribbon trim to the egg bottoms to cover the lip.

Step 2:
Use hot glue to attach ribbon ‘handles’ to the inside of the egg halves.

Step 3:
Fill your mini baskets with Eco Shred, moss, or your filler of choice, top with decorative accents and treats to your desire.

Paper Egg Mini Vase
"Wrappily’s products offer so much flexibility, I love using them for so much more than wrapping gifts!” says Tara. Eco Shred strips are the perfect size for decoupage crafts, like this mini decorative vase. Turn paper eggs into a perfect little vessel for small sprigs from the garden or that fell off a bouquet. They’d work great as an individual place setting or part of a larger display.

Supplies:
- Paper Kraft Eggs
- Wrappily Eco Shred (used here: Rainbow Flash)
- C-clamp
- Cutting tool like an X-acto or serrated knife
- Mod Podge
- Small flowers
Step 1: Clamp & Cut Egg to Create Opening

To convert the egg into a mini vase, slice off the narrow top. The paper eggs are tough to cut, so use a clamp (not your fingers!) to securely hold as you cut through the paper maché. Please be careful and always cut away from your body.
Pro Tip: If you’d rather skip the cutting, this decorating technique can also be used on the whole egg.
Step 2: Decorate the Outside of the Egg

The individual shreds of Wrappily Eco Shred are the perfect width for working with Mod Podge to cover the egg. Working vertically, apply Mod Podge to your first strip of shred leaving a half inch overhang at the top to cover the exposed cut edge and paste to the inside of the egg. This will assure you have a clean, covered edge when you are finished. Continue by slightly overlapping each new strip as you work your way around the entire egg.

Top off with flowers, budding twigs, sprigs of herbs and your display is ready!
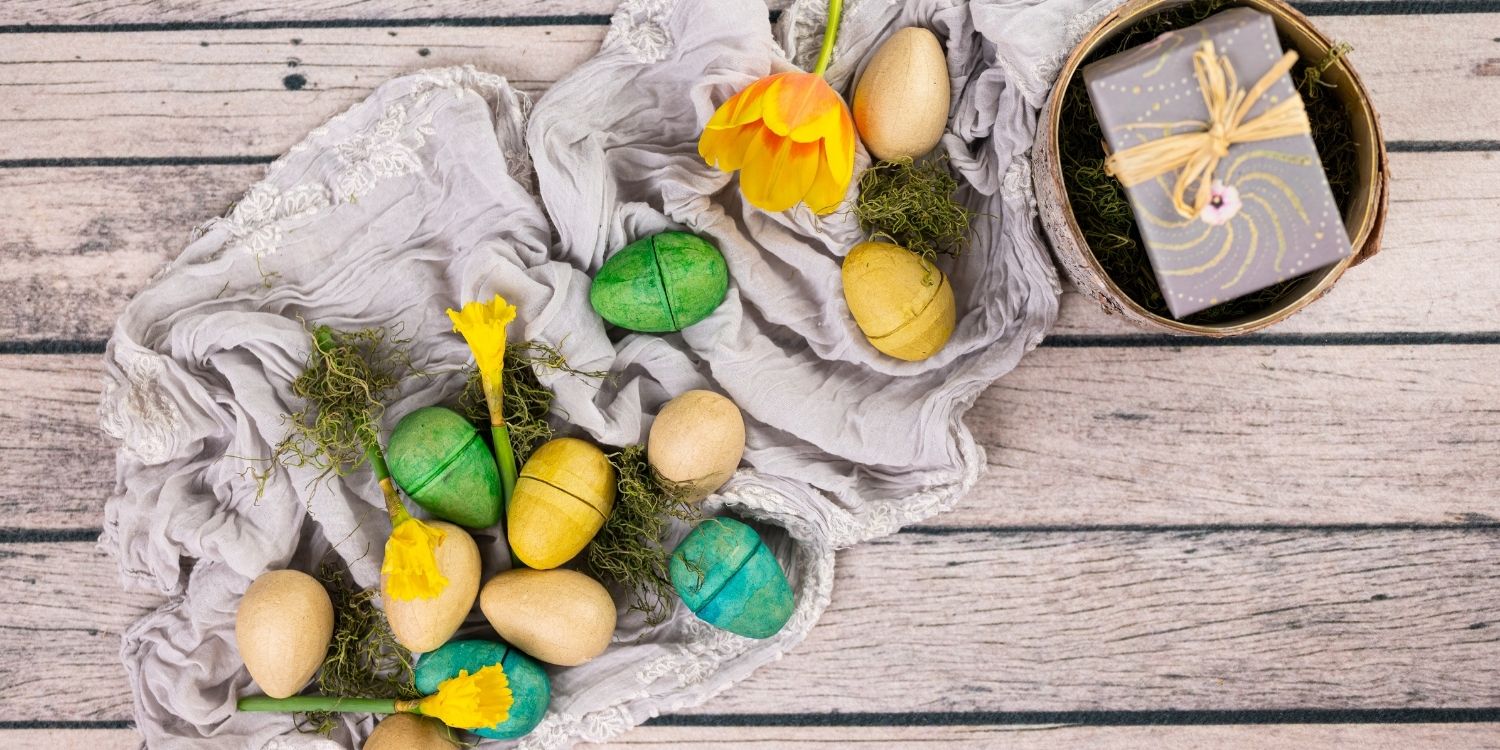
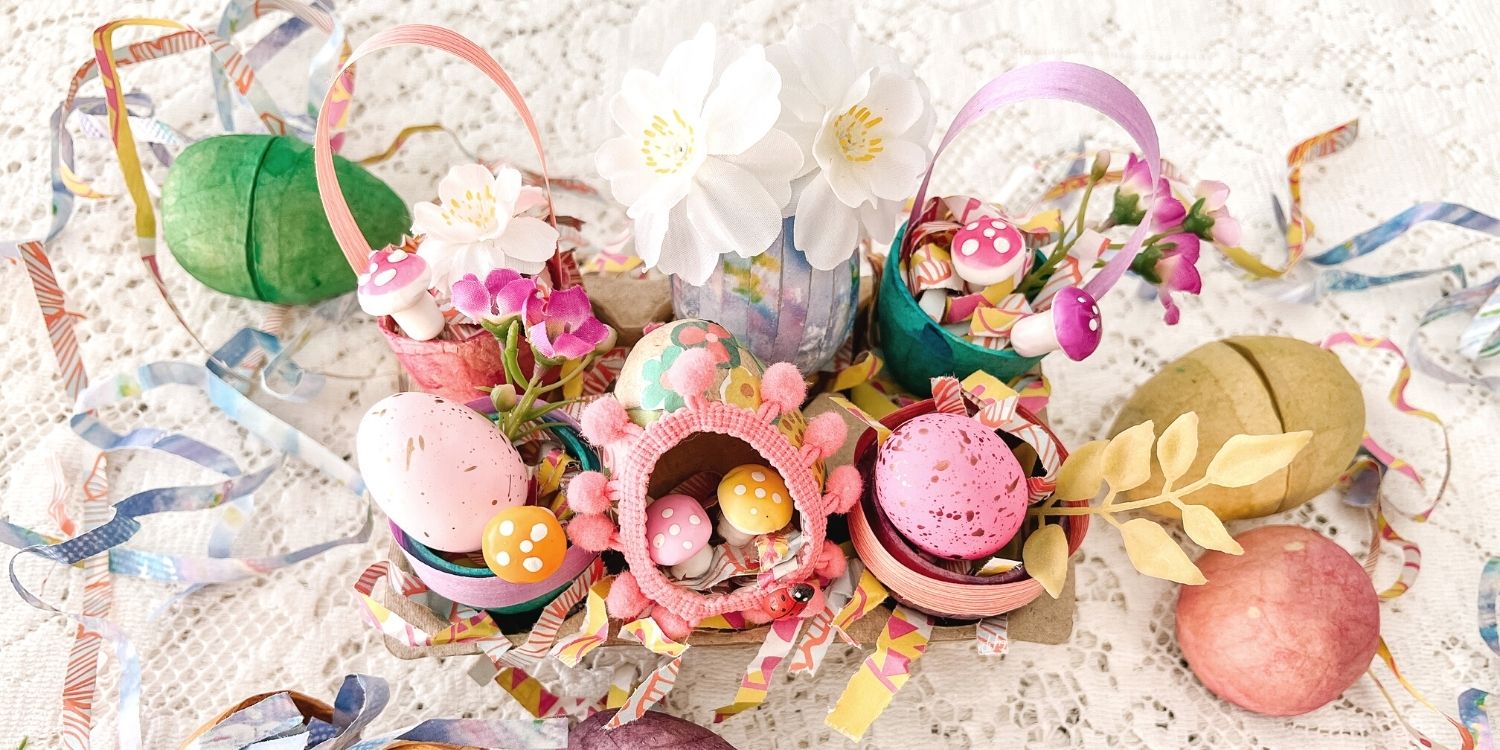
Creating a Spring Centerpiece
Bring all of your crafty egg creations together to create a centerpiece for your spring decor.
"To display together, use the bottom of an empty egg carton, fill with Wrappily shred or your filler of choice, and place in your crafted eggs," suggests Tara.

Get creative! Hang your eggs on a wire tree or create a spring garland to hang in front of a window or photo backdrop.
Happy crafting!
About the Artist: Tara Gray, of Modern Maven

Modern Maven is a Creative Studio where photography, styling, craftiness and inspiration all come together…encouraging you to indulge in your creative self. I’m Tara … portrait and lifestyle photographer, designer & stylist, lover of color and making things with my hands, teacher, wife and mother located in beautiful Jupiter, Florida. At Modern Maven, I offer a variety of services; including photography, event styling and workshops.
Featured Products


Eco Shred Basket Filler - Jungle
$7.00
– Sold OutA perfect nest for your goodies, this pliable recycled printed paper shred is easy to work with and provides a lofty fill to be used as Easter grass, basket/box filler, or crinkle-paper alternative.
Why You’ll Love this Eco-Friendly Basket Filler:
- Colorful prints add a subtle pop of color to your gift baskets, party centerpieces, and care packages being shipped around the country.
- The perfect party decor that can be stored with Easter decorations and reused year after year.
- Have fun designing a perfect basket with this fluffy stuff! Keep the fun colors and whimsy you’d expect from Easter grass and crinkle-paper filler without the plastic.
- Feel good knowing your eco-shred is recyclable and compostable. Your choice makes a big impact to green-up gifting.
Sustainable Materials:
- Package includes approximately 4 ounces of recyclable & compostable paper shred.
- Made in the USA with recycled, premium-grade newsprint that is sustainably milled, printed, and packaged in Washington State.
- Printed with soy-based inks
- Clear packaging is PLASTIC-FREE, made of biodegradable plant-based PLA


Paper Maché Eggs, Set of 6
$12.99
– Sold OutFinally, an eco-friendly alternative to dreaded plastic Easter eggs! Set of six sturdy paper maché eggs that are designed to be decorated to your heart's desire (but are certainly lovely enough to be used in the buff, too!) Hide them, display them, save them as a keepsake year after year. These handmade eggs are crafted from up-cycled newspaper and natural rice paste, they're 100% plastic-free, biodegradable and compostable. Perfect vegan alternative for Easter eggs! Each egg measures 6x4 cm; set of six eggs comes in a reusable drawstring natural fiber bag. Note: these eggs do not open and are not fillable.


Eco Shred Basket Filler - Rainbow Flash
$6.49 $7.00
A perfect nest for your goodies, this pliable recycled printed paper shred is easy to work with and provides a lofty fill to be used as Easter grass, basket/box filler, or crinkle-paper alternative.
Why You’ll Love this Eco-Friendly Basket Filler:
- Colorful prints add a subtle pop of color to your gift baskets, party centerpieces, and care packages being shipped around the country.
- The perfect party decor that can be stored with Easter decorations and reused year after year. Have fun designing a perfect basket with this fluffy stuff! Keep the fun colors and whimsy you’d expect from Easter grass and crinkle-paper filler without the plastic.
- Feel good knowing your eco-shred is recyclable and compostable. Your choice makes a big impact to green-up gifting.
Sustainable Materials: Package includes approximately 4 ounces of recyclable & compostable paper shred. Made in the USA with recycled, premium-grade newsprint that is sustainably milled, printed, and packaged in Washington State. Printed with soy-based inks. Clear packaging is PLASTIC-FREE, made of biodegradable plant-based PLA


Eco Shred Basket Filler - Yellow
$7.00
A perfect nest for your goodies, this pliable recycled printed paper shred is easy to work with and provides a lofty fill to be used as Easter grass, basket/box filler, or crinkle-paper alternative.
Why You’ll Love this Eco-Friendly Basket Filler:
- Colorful prints add a subtle pop of color to your gift baskets, party centerpieces, and care packages being shipped around the country.
- The perfect party decor that can be stored with Easter decorations and reused year after year. Have fun designing a perfect basket with this fluffy stuff! Keep the fun colors and whimsy you’d expect from Easter grass and crinkle-paper filler without the plastic.
- Feel good knowing your eco-shred is recyclable and compostable. Your choice makes a big impact to green-up gifting.
Sustainable Materials: Package includes approximately 4 ounces of recyclable & compostable paper shred. Made in the USA with recycled, premium-grade newsprint that is sustainably milled, printed, and packaged in Washington State. Printed with soy-based inks. Clear packaging is PLASTIC-FREE, made of biodegradable plant-based PLA


Raffia Flower Gift Topper, set of 3
$9.99 $12.00
A set of three crochet raffia flowers designed to add a quick touch of natural elegance to any gift bag or box. Handmade of abaca leaf fiber (a relative to the banana plant) with just a hint of sparkle woven in. Ties on easily with loop on back and provided twine for a perfect look every time!


Seeds 'n Blooms/ Ladybugs
$10.80
Wrap the best looking gift at the party! Presenting the eco-friendly, double-sided wrapping paper of your dreams: Seeds 'n Blooms is a new Wrappily exclusive by illustrator and graphic designer Misha Zadeh.
Celebrate sustainably with our recycled and recyclable wrapping paper. Reversible patterns make holiday gift wrapping fun! Paper works great for crafting, too.
Package includes three double-sided wrapping paper sheets + adhesive gift tags
• Sheet size 21.5" x 34"
• Premium newsprint + soy-based inks = eco-friendly wrapping paper
• Plastic-free PLA packaging
• Flat, folded sheet for easy storage
• No unnecessary cardboard tube
• 100% recyclable and compostable
• Milled, printed and packaged in Washington State
JOIN the mission to green-up gifting!
#wrapriprecycle #wraphappy #gifthappily


Sea Green (Paper Ribbon)
$7.50
-
Wrap it up and tie it with a bow! This eco-friendly paper ribbon not only adds a perfect pop of color, it's recyclable, compostable and made with non-toxic, water soluble dyes. What a score! It's shapable, versatile, fairly sturdy, and has a great crinkle texture allowing you to get creative tying-on that finishing touch to your gifts.
-
Ribbon is 1.5" wide. Each spool is 25 yards.


Enchanted Garden - Double-sided Eco Wrapping Paper for Everyday Gifting
$10.80
-
What kind of magical realm do those lovely keys unlock? One filled of sweet bunnies, fanciful feathered friends, and bursts of blooming flowers. The Enchanted Garden, designed by Tamara Houtveen, offers two charming patterns, perfect gift wrap for baby showers, kids' birthdays, or anyone who fancies a bit of whimsy and romance.
This pattern was a crowd-favorite winner in our annual EarthDay Design Contest. -
Wrappily's reversible gift wrap sheets come flat and folded with complementary gift tag stickers. Full sheet size is 21.5" x 34". Printed in Washington State on recycled and recyclable newsprint.


Orchid - Cotton Curling Ribbon
$7.00
– Sold OutLoop it, tie it, curl it –– this Orchid cotton curling ribbon is the perfect eco-friendly alternative to plastic curling ribbons.
Why You’ll Love this Curling Ribbon:
- Curls easily with scissors. Crimped or uncrimped - this ribbon curls like magic.
- Get creative with your ribbon styles - split into thinner strands or even quill into fun shapes to use as a gift topper. The sky is the limit! Check out our blog for more creative ideas.
- Feel good choosing a ribbon that’s plastic-free, compostable, and biodegradable. It really makes an impact to green-up gifting!
Sustainable Materials:
- Uncoated and unwoven cotton curling ribbon is 1/2” wide. Each spool is 10 yards.
- Beautiful COLOR made with water-based dyes and soy-based non-toxic ink.
- Made in the USA with cotton yarn sustainably grown & dyed by an artisanal ribbon maker in Milwaukee, Wisconsin
- Plastic-free packaging on a cardboard spool.
Care & Disposal Instructions:
- Store in cool, dry area outside of direct sunlight to preserve color.
- Uncoated ribbon is stiffer than its plastic counterparts and may require a heavier hand to hold & tie. We recommend creasing the corners where the ribbon wraps around your box for a nice crisp look.
- Compost in your green bin or in the backyard with your compostable gift wrap.


Mushrooms/ Snails
$10.80
Wrap the best looking gift at the party! Presenting the eco-friendly, double-sided wrapping paper of your dreams: Mushrooms/Snails is a new Wrappily exclusive by illustrator and graphic designer Misha Zadeh.
Celebrate sustainably with our recycled and recyclable wrapping paper. Reversible patterns make holiday gift wrapping fun! Paper works great for crafting, too.
Package includes three double-sided wrapping paper sheets + adhesive gift tags
• Sheet size 21.5" x 34"
• Premium newsprint + soy-based inks = eco-friendly wrapping paper
• Plastic-free PLA packaging
• Flat, folded sheet for easy storage
• No unnecessary cardboard tube
• 100% recyclable and compostable
• Milled, printed and packaged in Washington State
JOIN the mission to green-up gifting!
#wrapriprecycle #wraphappy #gifthappily


Eco Shred Basket Filler - Spring
$7.00
– Sold OutA perfect nest for your goodies, this pliable recycled printed paper shred is easy to work with and provides a lofty fill to be used as Easter grass, basket/box filler, or crinkle-paper alternative.
Why You’ll Love this Eco-Friendly Basket Filler:
- Colorful prints add a subtle pop of color to your gift baskets, party centerpieces, and care packages being shipped around the country.
- The perfect party decor that can be stored with Easter decorations and reused year after year. Have fun designing a perfect basket with this fluffy stuff! Keep the fun colors and whimsy you’d expect from Easter grass and crinkle-paper filler without the plastic.
- Feel good knowing your eco-shred is recyclable and compostable. Your choice makes a big impact to green-up gifting.
Sustainable Materials: Package includes approximately 4 ounces of recyclable & compostable paper shred. Made in the USA with recycled, premium-grade newsprint that is sustainably milled, printed, and packaged in Washington State. Printed with soy-based inks. Clear packaging is PLASTIC-FREE, made of biodegradable plant-based PLA


Pink Hibiscus
$10.80
Celebrate sustainably with Wrappily recycled and recyclable double-sided eco wrapping paper featuring the nostalgic botanical visions of Lola Pilar Hawaii. Reversible patterns make gift wrapping fun! Paper works great for crafting, too.
Package includes three sheets + adhesive gift tags
• Sheet size 21.5" x 34"
• Premium newsprint + soy-based inks
• Plastic-free PLA packaging
• Flat, folded sheet for easy storage
• No unnecessary cardboard tube
• 100% recyclable and compostable
• Milled, printed and packaged in Washington State
JOIN the mission to green-up gifting! #wrapriprecycle #wraphappy #gifthappily


Jonquil - Cotton Curling Ribbon
$7.00
– Sold OutLoop it, tie it, curl it –– this Jonquil yellow cotton curling ribbon is the perfect eco-friendly alternative to plastic curling ribbons.
Why You’ll Love this Curling Ribbon:
- Curls easily with scissors. Crimped or uncrimped - this ribbon curls like magic.
- Get creative with your ribbon styles - split into thinner strands or even quill into fun shapes to use as a gift topper. The sky is the limit! Check out our blog for more creative ideas.
- Feel good choosing a ribbon that’s plastic-free, compostable, and biodegradable. It really makes an impact to green-up gifting!
Sustainable Materials:
- Uncoated and unwoven cotton curling ribbon is 1/2” wide. Each spool is 10 yards.
- Beautiful COLOR made with water-based dyes and soy-based non-toxic ink.
- Made in the USA with cotton yarn sustainably grown & dyed by an artisanal ribbon maker in Milwaukee, Wisconsin
- Plastic-free packaging on a cardboard spool.
Care & Disposal Instructions:
- Store in cool, dry area outside of direct sunlight to preserve color.
- Uncoated ribbon is stiffer than its plastic counterparts and may require a heavier hand to hold & tie. We recommend creasing the corners where the ribbon wraps around your box for a nice crisp look.
- Compost in your green bin or in the backyard with your compostable gift wrap.


Eco Shred Basket Filler - Candy Stripe
$6.49 $7.00
A perfect nest for your goodies, this pliable recycled printed paper shred is easy to work with and provides a lofty fill to be used as Easter grass, basket/box filler, or crinkle-paper alternative.
Why You’ll Love this Eco-Friendly Basket Filler:
- Colorful prints add a subtle pop of color to your gift baskets, party centerpieces, and care packages being shipped around the country.
- The perfect party decor that can be stored with Easter decorations and reused year after year. Have fun designing a perfect basket with this fluffy stuff! Keep the fun colors and whimsy you’d expect from Easter grass and crinkle-paper filler without the plastic.
- Feel good knowing your eco-shred is recyclable and compostable. Your choice makes a big impact to green-up gifting.
Sustainable Materials: Package includes approximately 4 ounces of recyclable & compostable paper shred. Made in the USA with recycled, premium-grade newsprint that is sustainably milled, printed, and packaged in Washington State. Printed with soy-based inks. Clear packaging is PLASTIC-FREE, made of biodegradable plant-based PLA


Lamb Meadow
$6.99 $10.80
Little lambs leaping through the meadow, what a peaceful scene! In soft hues, it makes a lovely choice for baby shower gifts or little kids birthdays. Designed by Sanna Kallio, Lamb Meadow is a crowd favorite from our annual Earth Day Design Contest.
Wrappily's reversible gift wrap sheets come flat and folded with complementary gift tag stickers. Sheet size is 21.5" x 34". Printed in Washington State on recycled and recyclable newsprint.


Jana Lam - Plumeria + Palm Shadow
$10.80
Celebrate sustainably with our recycled and recyclable double-sided eco wrapping paper featuring the bold tropical pattern play of Hawaii-based textile designer, Jana Lam. Reversible patterns of bold plumeria blossoms mix with shadowy palm fonds to make gift wrapping fun! Paper works great for crafting, too.
Package includes three sheets + adhesive gift tags
• Sheet size 21.5" x 34"
• Premium newsprint + soy-based inks
• Plastic-free PLA packaging, certified compostable + biodegradable
• Flat, folded sheet for easy storage
• No unnecessary cardboard tube
• 100% recyclable and compostable
• Milled, printed and packaged in Washington State
JOIN the mission to green-up gifting!
#wrapriprecycle #wraphappy #gifthappily


Pink (Paper Ribbon)
$7.50
-
Wrap it up and tie it with a bow! This eco-friendly paper ribbon not only adds a perfect pop of color, it's recyclable, compostable and made with non-toxic, water soluble dyes. What a score! It's shapable, versatile, fairly sturdy, and has a great crinkle texture allowing you to get creative tying-on that finishing touch to your gifts.
-
Ribbon is 1.5" wide. Each spool is 25 yards.


Jana Lam - Retro Blooms + Monstera Shadow
$10.80
Celebrate sustainably with our recycled and recyclable double-sided eco wrapping paper featuring the bold, tropical pattern play of Hawaii-based textile designer, Jana Lam. Reversible patterns of monstera leaves mingle with retro flower blossoms to make gift wrapping fun! Paper works great for crafting, too.
Package includes three sheets + adhesive gift tags
• Sheet size 21.5" x 34"
• Premium newsprint + soy-based inks
• Plastic-free PLA packaging, certified compostable + biodegradable
• Flat, folded sheet for easy storage
• No unnecessary cardboard tube
• 100% recyclable and compostable
• Milled, printed and packaged in Washington State
JOIN the mission to green-up gifting!
#wrapriprecycle #wraphappy #gifthappily


Pineapple Splash/ Mini Palm - Double-sided Eco Wrapping Paper for Everyday Gifting
$10.80
Somewhere over the rainbow... purple pineapples float amidst the palms. At least they do in Hawaii-based fine artist Lauren Roth's dreamy tropical visions. Pineapple Splash/ Mini Palms is part of her Over the Rainbow collection, a juicy new addition to our everyday gift wrap.
Wrappily's reversible gift wrap sheets come flat and folded with complementary gift tag stickers. Sheet size is 21.5" x 34". Printed in Washington State on recycled and recyclable newsprint.


Jana Lam - Tropical Leaves/ Rainbow Orchids
$10.80
Textile designer Jana Lam's newest patterns for Wrappily are the stuff tropical dreams are made of—a juicy rainbow full of shells, pineapples, and lots of flower power. Tropical Leaves/ Rainbow Orchids pairs two Jana Lam signatures: bold banana leaves and orchids in a rainbow gradient. The combo offers a perfect 'everyday' gift wrap for graduations, weddings, birthdays, and more.
Coordinates with:
Pineapple Blush/ SeaFlower
Monstera Jungle/ Shellini
Paper Ribbon Quad: Island Dream
Reversible gift wrap sheets come flat and folded with complementary gift tag stickers. Three sheets per pack. Each Sheet is 21.5" x 34”. Printed in Washington State on recycled and recyclable newsprint.


Rainbow Sails/Dots
$10.80
Celebrate sustainably with our recycled and recyclable double-sided eco wrapping paper featuring the cheerful art of watercolorist and published author, Meera Lee Patel. Reversible patterns make gift wrapping fun! Paper works great for crafting, too.
Package includes three sheets + adhesive gift tags
• Sheet size 21.5" x 34"
• Premium newsprint + soy-based inks
• Plastic-free PLA packaging
• Flat, folded sheet for easy storage
• No unnecessary cardboard tube
• 100% recyclable and compostable
• Milled, printed and packaged in Washington State
JOIN the mission to green-up gifting!
#wrapriprecycle #wraphappy #gifthappily


Pineapple Blush/ Sea Flower by Jana Lam
$10.80
Wrap the best looking gift at the party!
Presenting the eco-friendly, double-sided wrapping paper that tropical dreams are made of:
Pineapple Blush/ SeaFlower by Jana Lam packs a fruity punch, mixing and matching this combo of soft-petaled pua (flowers) and pineapple sweeties will add a rosy touch to any gift.
Each pack of gift wrap includes: (3) Sheets of double-sided wrapping paper and adhesive gift tags. Each full sheet size is 21.5" x 34”. Paper arrives flat and folded in plastic-free PLA bag made of plant starch.
Our eco-friendly wrapping paper is milled, printed, and packaged in Washington State on recycled SFI certified newsprint making it 100% Recyclable and Compostable.


Hibiscus Fan/ Rainbow Stripes
$10.80
It's hard to say which is more uplifting here, the unabashedly happy painted rainbow stripes or the deliciously divine floral fan palms. We know one thing, when used together there's a multiplier effect of pure joy. Hibiscus Fan Palm/ Rainbow Stripes is part of our new everyday gift wrap collection, Over the Rainbow, designed for us by Hawaii-based fine artist Lauren Roth.
Wrappily's reversible gift wrap sheets come flat and folded with complementary gift tag stickers. Sheet size is 21.5" x 34". Printed in Washington State on recycled and recyclable newsprint.