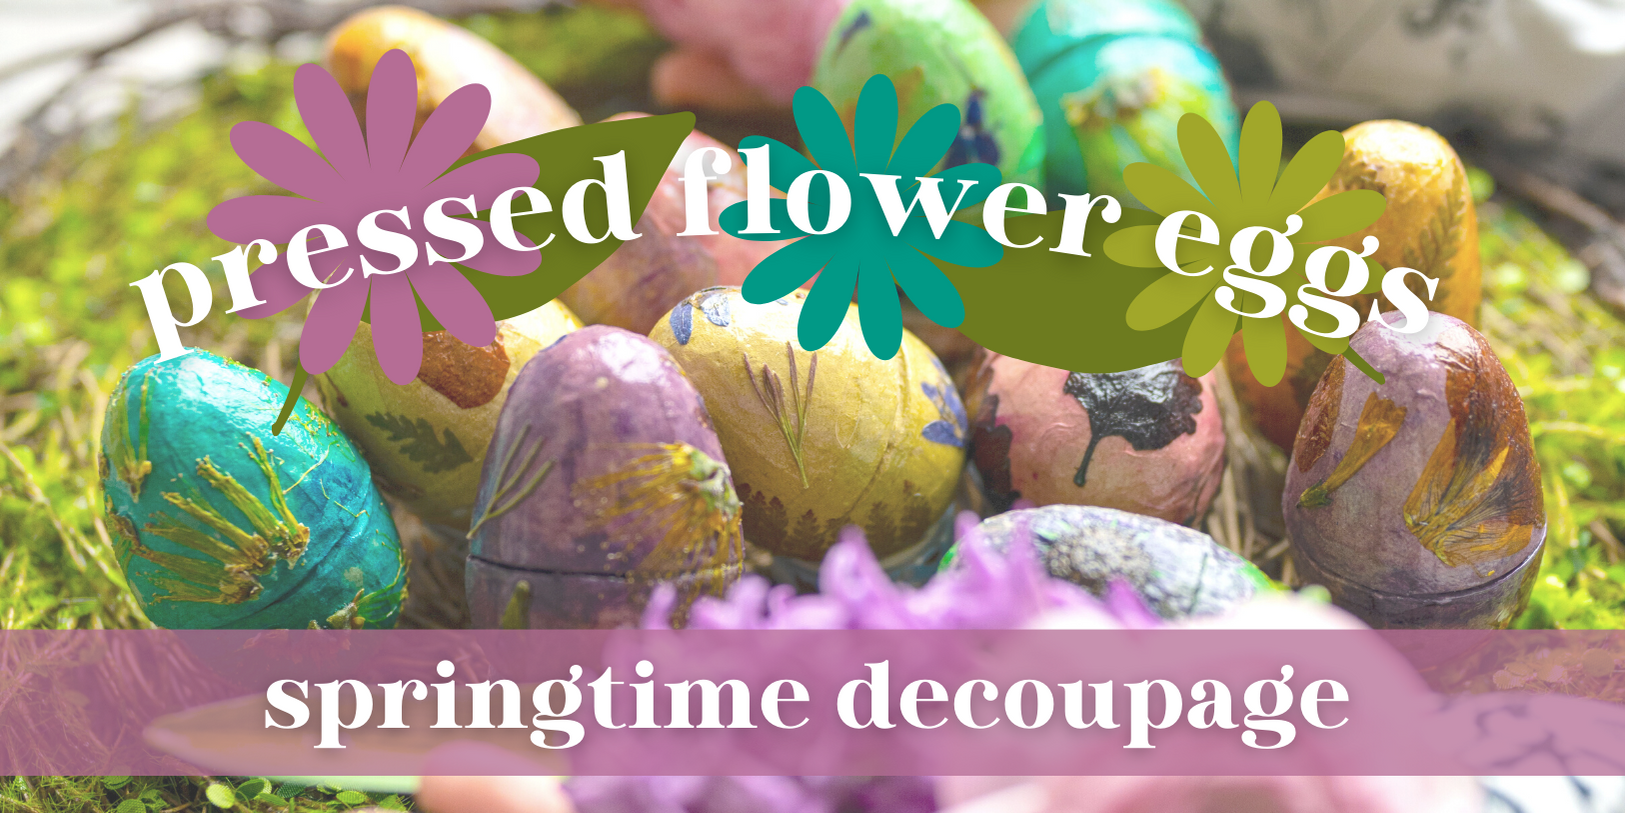
Make These Gorgeous And Reusable Plaster Easter Eggs

It's hard to resist the appeal of Easter eggs!
The way we see it, there's a zillion reasons to make these lovely plaster eggs. As a craft, it's fun for both kids and adults. Plaster is a great replacement for plastic eggs for those looking to go plastic-free (and eliminating the candy-filling issue along the way), they're reusable, they're an ethical choice (vegan/ cruelty-free), and they don't attribute to food waste.
Plaster eggs are beautiful enough for a holiday table centerpiece, yet sturdy enough for an egg hunt. Used in rough form, they work as a homemade sidewalk chalk (bonus for the kiddos!) Alternately they can be finished in handsome detail for a seasonal keepsake to enjoy each Easter season. As a kids' craft, year after year, these eggs become a benchmark of the child's development and creative journey.
And lastly, let's be honest, it's just fun to make a mess sometimes. With this post's help, we hope you're inspired to dive into creating something beautiful this Easter season.

This Easter bunny loves what's in his basket: plaster eggs are an ethical choice, they are reusable, vegan/ cruelty-free, and do not attribute to food waste. All this and they're lovely, too!
Plaster Easter Eggs - Supply list:
- Plaster of Paris
- Acrylic craft paints (optional)
- Plastic eggs (upcycled or thrifted)
- Power drill
- Containers & mixing tools
- Funnel
- Small spatula and/ or skewer
- Petroleum jelly
- Extra egg cartons
- Sandpaper - Fine to Medium gauge (optional)
Step 1: Prepare your molds
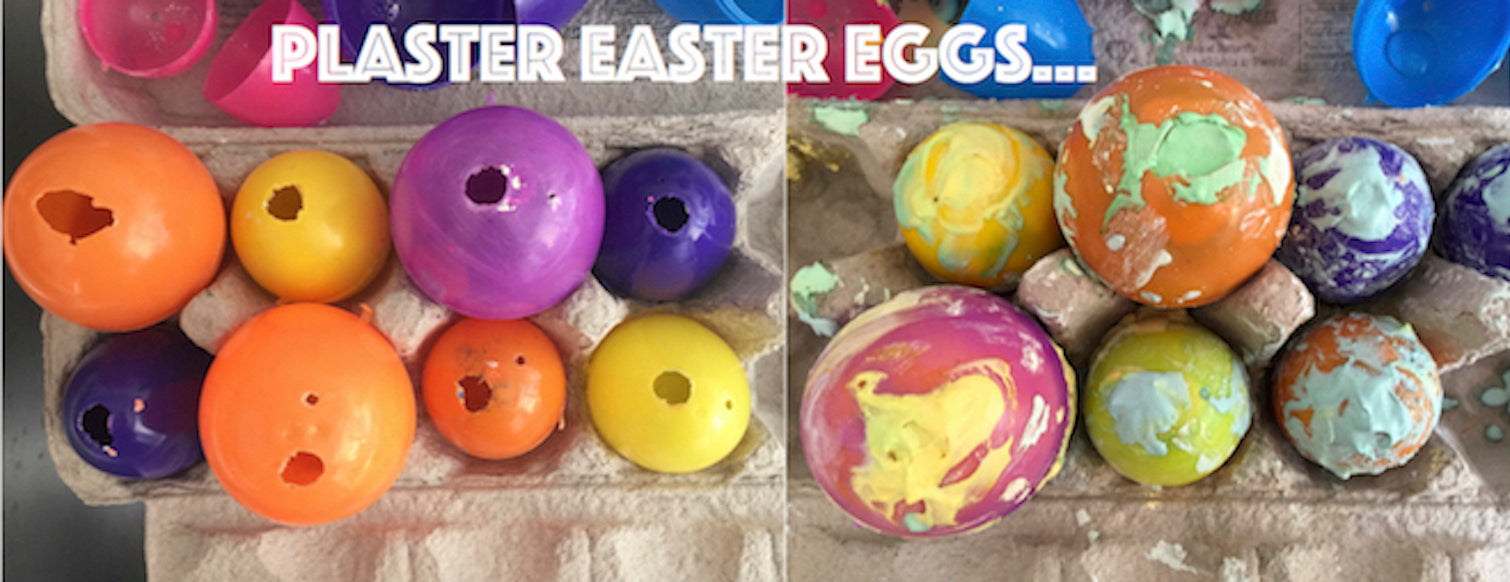
This step will take some time, but the good news is that the molds are reusable and last a long time. We used ours multiple times and will be saving them again for next year. First step is to find some old plastic eggs in sizes that appeal to you. If you don't have old ones on-hand, ask around or check the thrift store. It's besides the point to go buy new plastic eggs for this craft, please try to up-cycle. And one last tip: make sure you have a drill bit slightly larger than your funnel tip.
- Drill a hole through the bottom (wider base) of each plastic egg
- Use tape to seal all other tiny holes on the mold
- Coat inside of egg generously with petroleum jelly, being careful not to get on the outside
- Click egg shut and reinforce with tape
- Prop them all up in an egg carton. Now you're ready for action.

Step 2: Mix the plaster
Working in small batches, follow the ratio recommended on the instructions (usually 2 parts plaster: 1 part water). Mix in acrylic craft paint for colored plaster. Because the plaster hardens quickly and we were free-mixing colors, we dissolved the paint into the water first before adding the plaster powder. We mixed 1 cup of plaster at a time, this filled approx. 3 small eggs or 1 large/ 1 small egg (depending on spills, and we had a few). Do not rinse plaster down the drain, scrape extra into the trash can.

Step 3: Fill the molds
It helps to have an extra set of hands and a small spatula for this step. Like we said, the mix dries fast, so you must work quickly. Pour small amounts through your funnel at a time. Gently tap mix down into the egg to release bubbles. Top-off as necessary, you want egg filled beyond the brim. If plaster starts to thicken, you may need a chopstick or skewer to work it through the funnel. For two-tone eggs, fill half the mold at a time; tip mold slightly to create a diagonal. What a beautiful mess!

Step 4: Practice your patience
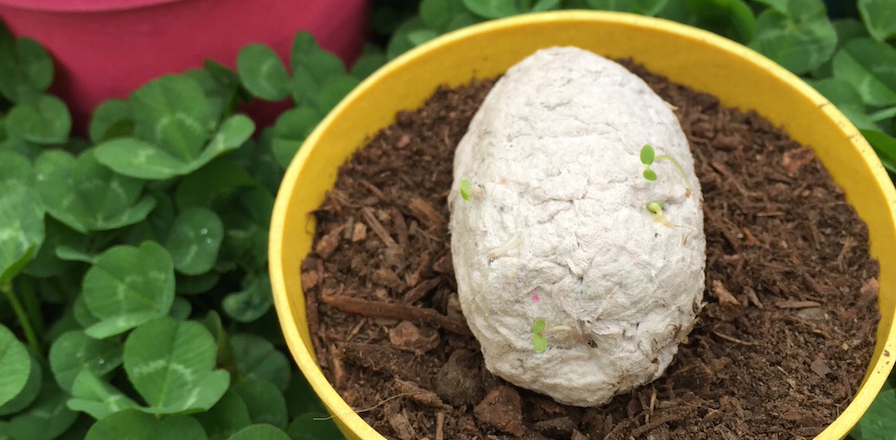
Let the plaster harden in the eggs for at least an hour or two before breaking into the molds. Oh, the anticipation...

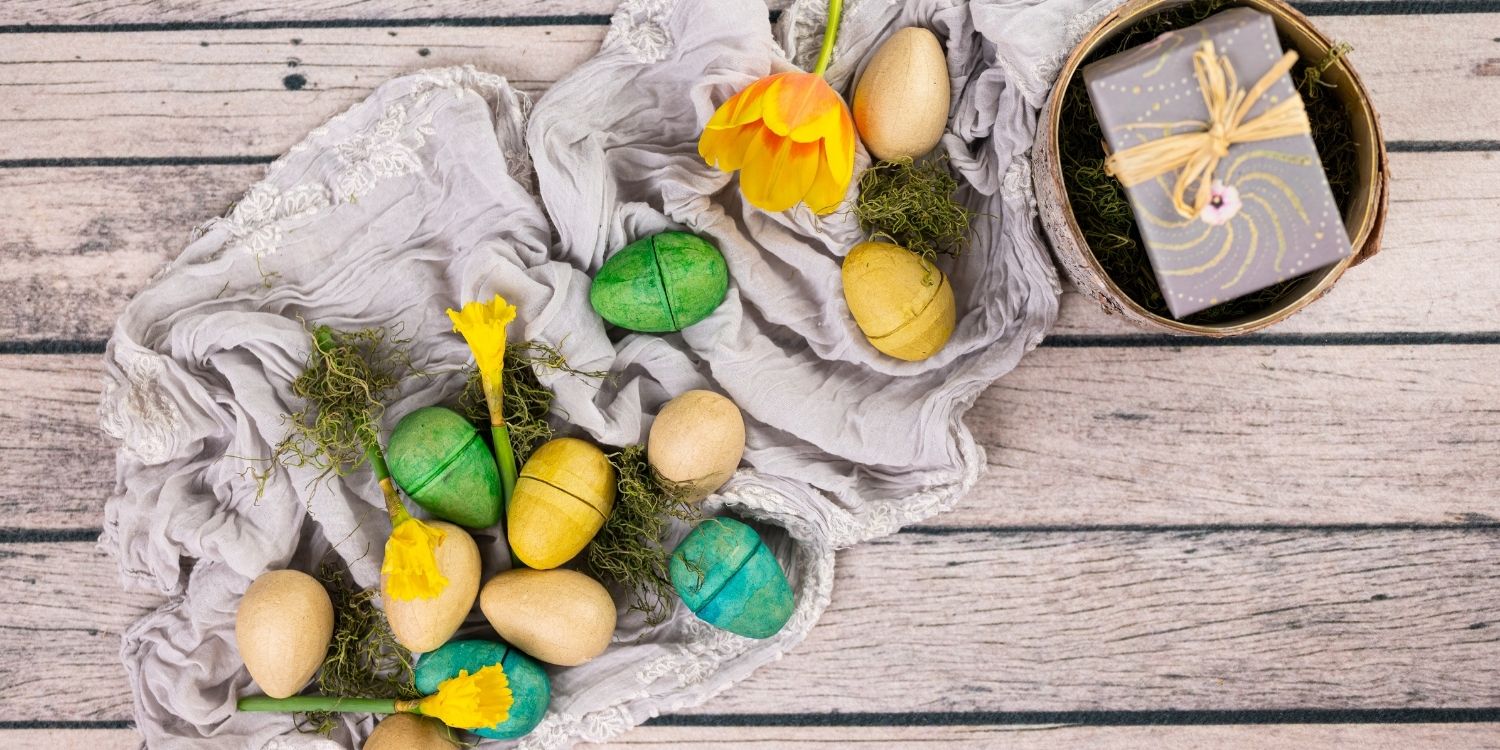
Making plaster Easter eggs, what a beautiful mess. It's a craft kids and adults will love.
Step 5: The big reveal!
Use a towel to twist apart the mold halves to reveal your plaster eggs. If stuck, carefully work the long edge of a knife into the mold crease to break the seal. Do not use the knife tip, and be very careful, your hands may be slippery from the petroleum jelly coating.
Aren't they lovely? If you plan to use the eggs as sidewalk chalk or you especially dig the rough imperfections, this be your stopping point—though the eggs will need a few more hours (an up to a few days, depending on your humidity) to dry completely.

Plaster eggs straight out of their molds also double as homemade sidewalk chalk, a bonus for kids and a great idea for a candy-free egg hunt.
Step 6 (optional): Wet sanding
To smooth the surface of your egg, use a fine to medium-gauge sandpaper, apply a bit of water, and a lot of elbow grease. Wet sanding helps contain the plaster dust, which is hazardous to inhale. Nevertheless, work in a well-ventilated area and have children wear dust masks. Read and head the information on the plaster packaging. Use a gentle touch with the sandpaper, thinking always of the contour of the egg. Use small circular movements around the line created by the mold crease. The last thing you want to do is sand a flat spot onto your egg!


Step 7: Practice more patience
Let dry. Like we mentioned, depending on the humidity in your area, the eggs will need a few more hours to a few days to dry completely.

As your handmade beauties dry, dream of the Easter egg decorating possibilities. These plaster eggs are beautiful enough for a holiday table centerpiece and sturdy enough for an egg hunt.
Step 8 (optional): Finishing touches
Though we think they're lovely as they are, once the eggs are completely dry, you can decorate them even more by playing around with finishing touches. Ideas worth exploring include: adding decorative detail with paints, glitter, even Sharpie markers. Decoupage or paper mache would be stunning. Hey, add rhinestones, if that's your style. The point of all this work is to create a collection of keepsakes that you look forward to bringing out each Easter season.

Sweet little Easter basket filled with reusable plaster eggs, painted in bright pearly colors.
Tips and best practices:
Having experimented with this craft a few times, we're happy to share our failures to save you the trouble. Take the time to prep the molds carefully. In our impatience the first time we didn't reinforce the eggs with tape and seal the little holes and we ended up with a big mess. If the petroleum jelly gets on the outside of your mold, no tape to stick to it! It's worth being extra cautious when applying. We tried using food coloring instead of paint—don't do it. The color fades and pools in odd ways. We tried adding glitter both to the wet plaster mix and to the inside of the mold before we poured in the plaster, neither worked—especially if you'll be sanding the eggs.
If you have a question for us, send an email to gifthappily@wrappily.com
Happy crafting!
Featured Products


Eco Shred Basket Filler - Jungle
$7.00
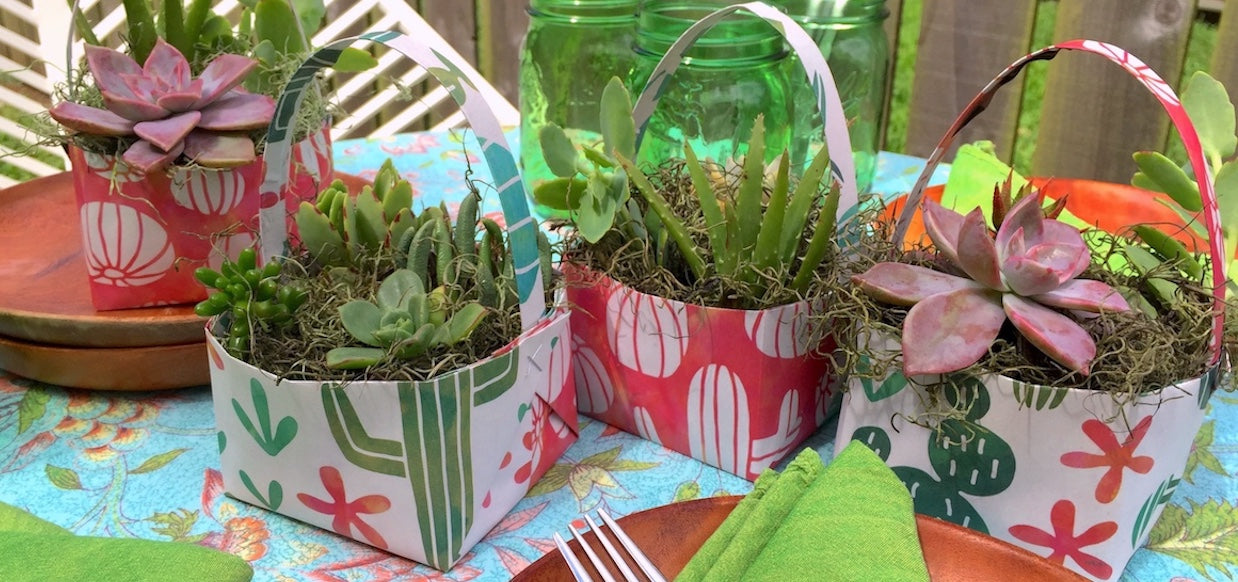
– Sold OutA perfect nest for your goodies, this pliable recycled printed paper shred is easy to work with and provides a lofty fill to be used as Easter grass, basket/box filler, or crinkle-paper alternative.
Why You’ll Love this Eco-Friendly Basket Filler:
- Colorful prints add a subtle pop of color to your gift baskets, party centerpieces, and care packages being shipped around the country.
- The perfect party decor that can be stored with Easter decorations and reused year after year.
- Have fun designing a perfect basket with this fluffy stuff! Keep the fun colors and whimsy you’d expect from Easter grass and crinkle-paper filler without the plastic.
- Feel good knowing your eco-shred is recyclable and compostable. Your choice makes a big impact to green-up gifting.
Sustainable Materials:
- Package includes approximately 4 ounces of recyclable & compostable paper shred.
- Made in the USA with recycled, premium-grade newsprint that is sustainably milled, printed, and packaged in Washington State.
- Printed with soy-based inks
- Clear packaging is PLASTIC-FREE, made of biodegradable plant-based PLA


Paper Maché Eggs, Set of 6
$12.99
– Sold OutFinally, an eco-friendly alternative to dreaded plastic Easter eggs! Set of six sturdy paper maché eggs that are designed to be decorated to your heart's desire (but are certainly lovely enough to be used in the buff, too!) Hide them, display them, save them as a keepsake year after year. These handmade eggs are crafted from up-cycled newspaper and natural rice paste, they're 100% plastic-free, biodegradable and compostable. Perfect vegan alternative for Easter eggs! Each egg measures 6x4 cm; set of six eggs comes in a reusable drawstring natural fiber bag. Note: these eggs do not open and are not fillable.


Eco Shred Basket Filler - Rainbow Flash
$6.49 $7.00
A perfect nest for your goodies, this pliable recycled printed paper shred is easy to work with and provides a lofty fill to be used as Easter grass, basket/box filler, or crinkle-paper alternative.
Why You’ll Love this Eco-Friendly Basket Filler:
- Colorful prints add a subtle pop of color to your gift baskets, party centerpieces, and care packages being shipped around the country.
- The perfect party decor that can be stored with Easter decorations and reused year after year. Have fun designing a perfect basket with this fluffy stuff! Keep the fun colors and whimsy you’d expect from Easter grass and crinkle-paper filler without the plastic.
- Feel good knowing your eco-shred is recyclable and compostable. Your choice makes a big impact to green-up gifting.
Sustainable Materials: Package includes approximately 4 ounces of recyclable & compostable paper shred. Made in the USA with recycled, premium-grade newsprint that is sustainably milled, printed, and packaged in Washington State. Printed with soy-based inks. Clear packaging is PLASTIC-FREE, made of biodegradable plant-based PLA


Eco Shred Basket Filler - Yellow
$7.00
A perfect nest for your goodies, this pliable recycled printed paper shred is easy to work with and provides a lofty fill to be used as Easter grass, basket/box filler, or crinkle-paper alternative.
Why You’ll Love this Eco-Friendly Basket Filler:
- Colorful prints add a subtle pop of color to your gift baskets, party centerpieces, and care packages being shipped around the country.
- The perfect party decor that can be stored with Easter decorations and reused year after year. Have fun designing a perfect basket with this fluffy stuff! Keep the fun colors and whimsy you’d expect from Easter grass and crinkle-paper filler without the plastic.
- Feel good knowing your eco-shred is recyclable and compostable. Your choice makes a big impact to green-up gifting.
Sustainable Materials: Package includes approximately 4 ounces of recyclable & compostable paper shred. Made in the USA with recycled, premium-grade newsprint that is sustainably milled, printed, and packaged in Washington State. Printed with soy-based inks. Clear packaging is PLASTIC-FREE, made of biodegradable plant-based PLA


Raffia Flower Gift Topper, set of 3
$9.99 $12.00
A set of three crochet raffia flowers designed to add a quick touch of natural elegance to any gift bag or box. Handmade of abaca leaf fiber (a relative to the banana plant) with just a hint of sparkle woven in. Ties on easily with loop on back and provided twine for a perfect look every time!


Seeds 'n Blooms/ Ladybugs
$10.80
Wrap the best looking gift at the party! Presenting the eco-friendly, double-sided wrapping paper of your dreams: Seeds 'n Blooms is a new Wrappily exclusive by illustrator and graphic designer Misha Zadeh.
Celebrate sustainably with our recycled and recyclable wrapping paper. Reversible patterns make holiday gift wrapping fun! Paper works great for crafting, too.
Package includes three double-sided wrapping paper sheets + adhesive gift tags
• Sheet size 21.5" x 34"
• Premium newsprint + soy-based inks = eco-friendly wrapping paper
• Plastic-free PLA packaging
• Flat, folded sheet for easy storage
• No unnecessary cardboard tube
• 100% recyclable and compostable
• Milled, printed and packaged in Washington State
JOIN the mission to green-up gifting!
#wrapriprecycle #wraphappy #gifthappily


Sea Green (Paper Ribbon)
$7.50
-
Wrap it up and tie it with a bow! This eco-friendly paper ribbon not only adds a perfect pop of color, it's recyclable, compostable and made with non-toxic, water soluble dyes. What a score! It's shapable, versatile, fairly sturdy, and has a great crinkle texture allowing you to get creative tying-on that finishing touch to your gifts.
-
Ribbon is 1.5" wide. Each spool is 25 yards.


Enchanted Garden - Double-sided Eco Wrapping Paper for Everyday Gifting
$10.80
-
What kind of magical realm do those lovely keys unlock? One filled of sweet bunnies, fanciful feathered friends, and bursts of blooming flowers. The Enchanted Garden, designed by Tamara Houtveen, offers two charming patterns, perfect gift wrap for baby showers, kids' birthdays, or anyone who fancies a bit of whimsy and romance.
This pattern was a crowd-favorite winner in our annual EarthDay Design Contest. -
Wrappily's reversible gift wrap sheets come flat and folded with complementary gift tag stickers. Full sheet size is 21.5" x 34". Printed in Washington State on recycled and recyclable newsprint.


Orchid - Cotton Curling Ribbon
$7.00
– Sold OutLoop it, tie it, curl it –– this Orchid cotton curling ribbon is the perfect eco-friendly alternative to plastic curling ribbons.
Why You’ll Love this Curling Ribbon:
- Curls easily with scissors. Crimped or uncrimped - this ribbon curls like magic.
- Get creative with your ribbon styles - split into thinner strands or even quill into fun shapes to use as a gift topper. The sky is the limit! Check out our blog for more creative ideas.
- Feel good choosing a ribbon that’s plastic-free, compostable, and biodegradable. It really makes an impact to green-up gifting!
Sustainable Materials:
- Uncoated and unwoven cotton curling ribbon is 1/2” wide. Each spool is 10 yards.
- Beautiful COLOR made with water-based dyes and soy-based non-toxic ink.
- Made in the USA with cotton yarn sustainably grown & dyed by an artisanal ribbon maker in Milwaukee, Wisconsin
- Plastic-free packaging on a cardboard spool.
Care & Disposal Instructions:
- Store in cool, dry area outside of direct sunlight to preserve color.
- Uncoated ribbon is stiffer than its plastic counterparts and may require a heavier hand to hold & tie. We recommend creasing the corners where the ribbon wraps around your box for a nice crisp look.
- Compost in your green bin or in the backyard with your compostable gift wrap.


Mushrooms/ Snails
$10.80
Wrap the best looking gift at the party! Presenting the eco-friendly, double-sided wrapping paper of your dreams: Mushrooms/Snails is a new Wrappily exclusive by illustrator and graphic designer Misha Zadeh.
Celebrate sustainably with our recycled and recyclable wrapping paper. Reversible patterns make holiday gift wrapping fun! Paper works great for crafting, too.
Package includes three double-sided wrapping paper sheets + adhesive gift tags
• Sheet size 21.5" x 34"
• Premium newsprint + soy-based inks = eco-friendly wrapping paper
• Plastic-free PLA packaging
• Flat, folded sheet for easy storage
• No unnecessary cardboard tube
• 100% recyclable and compostable
• Milled, printed and packaged in Washington State
JOIN the mission to green-up gifting!
#wrapriprecycle #wraphappy #gifthappily


Eco Shred Basket Filler - Spring
$7.00
– Sold OutA perfect nest for your goodies, this pliable recycled printed paper shred is easy to work with and provides a lofty fill to be used as Easter grass, basket/box filler, or crinkle-paper alternative.
Why You’ll Love this Eco-Friendly Basket Filler:
- Colorful prints add a subtle pop of color to your gift baskets, party centerpieces, and care packages being shipped around the country.
- The perfect party decor that can be stored with Easter decorations and reused year after year. Have fun designing a perfect basket with this fluffy stuff! Keep the fun colors and whimsy you’d expect from Easter grass and crinkle-paper filler without the plastic.
- Feel good knowing your eco-shred is recyclable and compostable. Your choice makes a big impact to green-up gifting.
Sustainable Materials: Package includes approximately 4 ounces of recyclable & compostable paper shred. Made in the USA with recycled, premium-grade newsprint that is sustainably milled, printed, and packaged in Washington State. Printed with soy-based inks. Clear packaging is PLASTIC-FREE, made of biodegradable plant-based PLA


Pink Hibiscus
$10.80
Celebrate sustainably with Wrappily recycled and recyclable double-sided eco wrapping paper featuring the nostalgic botanical visions of Lola Pilar Hawaii. Reversible patterns make gift wrapping fun! Paper works great for crafting, too.
Package includes three sheets + adhesive gift tags
• Sheet size 21.5" x 34"
• Premium newsprint + soy-based inks
• Plastic-free PLA packaging
• Flat, folded sheet for easy storage
• No unnecessary cardboard tube
• 100% recyclable and compostable
• Milled, printed and packaged in Washington State
JOIN the mission to green-up gifting! #wrapriprecycle #wraphappy #gifthappily


Jonquil - Cotton Curling Ribbon
$7.00
– Sold OutLoop it, tie it, curl it –– this Jonquil yellow cotton curling ribbon is the perfect eco-friendly alternative to plastic curling ribbons.
Why You’ll Love this Curling Ribbon:
- Curls easily with scissors. Crimped or uncrimped - this ribbon curls like magic.
- Get creative with your ribbon styles - split into thinner strands or even quill into fun shapes to use as a gift topper. The sky is the limit! Check out our blog for more creative ideas.
- Feel good choosing a ribbon that’s plastic-free, compostable, and biodegradable. It really makes an impact to green-up gifting!
Sustainable Materials:
- Uncoated and unwoven cotton curling ribbon is 1/2” wide. Each spool is 10 yards.
- Beautiful COLOR made with water-based dyes and soy-based non-toxic ink.
- Made in the USA with cotton yarn sustainably grown & dyed by an artisanal ribbon maker in Milwaukee, Wisconsin
- Plastic-free packaging on a cardboard spool.
Care & Disposal Instructions:
- Store in cool, dry area outside of direct sunlight to preserve color.
- Uncoated ribbon is stiffer than its plastic counterparts and may require a heavier hand to hold & tie. We recommend creasing the corners where the ribbon wraps around your box for a nice crisp look.
- Compost in your green bin or in the backyard with your compostable gift wrap.


Eco Shred Basket Filler - Candy Stripe
$6.49 $7.00
A perfect nest for your goodies, this pliable recycled printed paper shred is easy to work with and provides a lofty fill to be used as Easter grass, basket/box filler, or crinkle-paper alternative.
Why You’ll Love this Eco-Friendly Basket Filler:
- Colorful prints add a subtle pop of color to your gift baskets, party centerpieces, and care packages being shipped around the country.
- The perfect party decor that can be stored with Easter decorations and reused year after year. Have fun designing a perfect basket with this fluffy stuff! Keep the fun colors and whimsy you’d expect from Easter grass and crinkle-paper filler without the plastic.
- Feel good knowing your eco-shred is recyclable and compostable. Your choice makes a big impact to green-up gifting.
Sustainable Materials: Package includes approximately 4 ounces of recyclable & compostable paper shred. Made in the USA with recycled, premium-grade newsprint that is sustainably milled, printed, and packaged in Washington State. Printed with soy-based inks. Clear packaging is PLASTIC-FREE, made of biodegradable plant-based PLA


Lamb Meadow
$6.99 $10.80
Little lambs leaping through the meadow, what a peaceful scene! In soft hues, it makes a lovely choice for baby shower gifts or little kids birthdays. Designed by Sanna Kallio, Lamb Meadow is a crowd favorite from our annual Earth Day Design Contest.
Wrappily's reversible gift wrap sheets come flat and folded with complementary gift tag stickers. Sheet size is 21.5" x 34". Printed in Washington State on recycled and recyclable newsprint.


Jana Lam - Plumeria + Palm Shadow
$10.80
Celebrate sustainably with our recycled and recyclable double-sided eco wrapping paper featuring the bold tropical pattern play of Hawaii-based textile designer, Jana Lam. Reversible patterns of bold plumeria blossoms mix with shadowy palm fonds to make gift wrapping fun! Paper works great for crafting, too.
Package includes three sheets + adhesive gift tags
• Sheet size 21.5" x 34"
• Premium newsprint + soy-based inks
• Plastic-free PLA packaging, certified compostable + biodegradable
• Flat, folded sheet for easy storage
• No unnecessary cardboard tube
• 100% recyclable and compostable
• Milled, printed and packaged in Washington State
JOIN the mission to green-up gifting!
#wrapriprecycle #wraphappy #gifthappily


Pink (Paper Ribbon)
$7.50
-
Wrap it up and tie it with a bow! This eco-friendly paper ribbon not only adds a perfect pop of color, it's recyclable, compostable and made with non-toxic, water soluble dyes. What a score! It's shapable, versatile, fairly sturdy, and has a great crinkle texture allowing you to get creative tying-on that finishing touch to your gifts.
-
Ribbon is 1.5" wide. Each spool is 25 yards.


Jana Lam - Retro Blooms + Monstera Shadow
$10.80
Celebrate sustainably with our recycled and recyclable double-sided eco wrapping paper featuring the bold, tropical pattern play of Hawaii-based textile designer, Jana Lam. Reversible patterns of monstera leaves mingle with retro flower blossoms to make gift wrapping fun! Paper works great for crafting, too.
Package includes three sheets + adhesive gift tags
• Sheet size 21.5" x 34"
• Premium newsprint + soy-based inks
• Plastic-free PLA packaging, certified compostable + biodegradable
• Flat, folded sheet for easy storage
• No unnecessary cardboard tube
• 100% recyclable and compostable
• Milled, printed and packaged in Washington State
JOIN the mission to green-up gifting!
#wrapriprecycle #wraphappy #gifthappily


Pineapple Splash/ Mini Palm - Double-sided Eco Wrapping Paper for Everyday Gifting
$10.80
Somewhere over the rainbow... purple pineapples float amidst the palms. At least they do in Hawaii-based fine artist Lauren Roth's dreamy tropical visions. Pineapple Splash/ Mini Palms is part of her Over the Rainbow collection, a juicy new addition to our everyday gift wrap.
Wrappily's reversible gift wrap sheets come flat and folded with complementary gift tag stickers. Sheet size is 21.5" x 34". Printed in Washington State on recycled and recyclable newsprint.


Jana Lam - Tropical Leaves/ Rainbow Orchids
$10.80
Textile designer Jana Lam's newest patterns for Wrappily are the stuff tropical dreams are made of—a juicy rainbow full of shells, pineapples, and lots of flower power. Tropical Leaves/ Rainbow Orchids pairs two Jana Lam signatures: bold banana leaves and orchids in a rainbow gradient. The combo offers a perfect 'everyday' gift wrap for graduations, weddings, birthdays, and more.
Coordinates with:
Pineapple Blush/ SeaFlower
Monstera Jungle/ Shellini
Paper Ribbon Quad: Island Dream
Reversible gift wrap sheets come flat and folded with complementary gift tag stickers. Three sheets per pack. Each Sheet is 21.5" x 34”. Printed in Washington State on recycled and recyclable newsprint.


Rainbow Sails/Dots
$10.80
Celebrate sustainably with our recycled and recyclable double-sided eco wrapping paper featuring the cheerful art of watercolorist and published author, Meera Lee Patel. Reversible patterns make gift wrapping fun! Paper works great for crafting, too.
Package includes three sheets + adhesive gift tags
• Sheet size 21.5" x 34"
• Premium newsprint + soy-based inks
• Plastic-free PLA packaging
• Flat, folded sheet for easy storage
• No unnecessary cardboard tube
• 100% recyclable and compostable
• Milled, printed and packaged in Washington State
JOIN the mission to green-up gifting!
#wrapriprecycle #wraphappy #gifthappily


Pineapple Blush/ Sea Flower by Jana Lam
$10.80
Wrap the best looking gift at the party!
Presenting the eco-friendly, double-sided wrapping paper that tropical dreams are made of:
Pineapple Blush/ SeaFlower by Jana Lam packs a fruity punch, mixing and matching this combo of soft-petaled pua (flowers) and pineapple sweeties will add a rosy touch to any gift.
Each pack of gift wrap includes: (3) Sheets of double-sided wrapping paper and adhesive gift tags. Each full sheet size is 21.5" x 34”. Paper arrives flat and folded in plastic-free PLA bag made of plant starch.
Our eco-friendly wrapping paper is milled, printed, and packaged in Washington State on recycled SFI certified newsprint making it 100% Recyclable and Compostable.


Hibiscus Fan/ Rainbow Stripes
$10.80
It's hard to say which is more uplifting here, the unabashedly happy painted rainbow stripes or the deliciously divine floral fan palms. We know one thing, when used together there's a multiplier effect of pure joy. Hibiscus Fan Palm/ Rainbow Stripes is part of our new everyday gift wrap collection, Over the Rainbow, designed for us by Hawaii-based fine artist Lauren Roth.
Wrappily's reversible gift wrap sheets come flat and folded with complementary gift tag stickers. Sheet size is 21.5" x 34". Printed in Washington State on recycled and recyclable newsprint.